Cad 3D Category

Showing posts with label Architectural Visualization. Show all posts

Master Spline Modeling in 3ds Max: A Complete ArchViz Guide

Tuesday, November 3, 2026
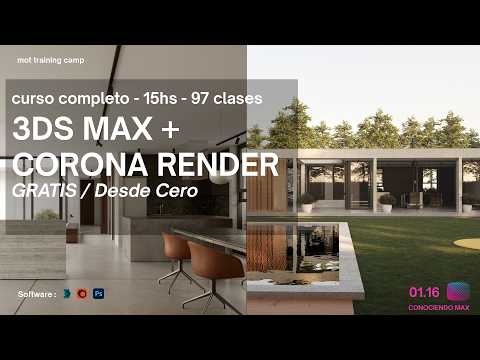
Are you ready to elevate your architectural visualization skills from scratch? Achieving photorealistic archviz projects requires a solid foundation in 3D modeling tools. Whether you are a complete beginner or an aspiring 3D artist looking to refine your workflow, 3ds Max remains the industry standard software for creating detailed, production-ready architectural models.

The Power of Splines and Lines in ArchViz

Before diving into complex lighting and texturing, every great 3D model starts with clean, precise geometry. In architectural modeling, lines and splines serve as the foundational blueprint. From drawing initial floor plans to defining custom wall profiles, crown moldings, and furniture frames, line work forms the backbone of accurate 3D structures. Mastering these vector-based controls allows you to build complex architectural shapes quickly while maintaining absolute precision.

Key Techniques for Working with Lines in 3ds Max

When creating complex architectural elements in 3ds Max, mastering splines and line tools is essential for an efficient workflow. Here are a few vital techniques every 3D artist should practice:

  • Extruding and Sweeping: Instantly transform 2D line profiles into 3D walls, cornices, or railings using powerful modifiers like Extrude, Sweep, and Bevel Profile.
  • Vertex Editing: Fine-tune corners and curves using Corner, Smooth, Bezier, and Bezier Corner vertex types for ultimate control over transitions.
  • Attaching and Boolean Operations: Combine multiple shapes or trim intersecting paths effortlessly to build intricate interior and exterior layouts without cluttering your scene hierarchy.

Bringing Geometry to Life with Corona Renderer

Once your base linework is properly structured, transitioning from 2D splines to 3D architectural volumes becomes seamless. Combining these precise linework techniques with Corona Renderer elevates your 3ds Max workflow even further. Corona's intuitive rendering engine allows you to apply realistic physical materials, set up natural sun and sky lighting, and generate photorealistic archviz renders effortlessly.

Start Building Your ArchViz Future Today

Learning 3D modeling doesn't have to be overwhelming. By breaking down complex projects into structured, step-by-step methods—starting with basic lines and splines—you can construct realistic architectural scenes with complete confidence. Practice these core linework fundamentals today and take your visualization projects to the next level!

Continue Reading | ความคิดเห็น

How to Customize Window Opening Angles in ArchiCAD 3D

Thursday, October 15, 2026

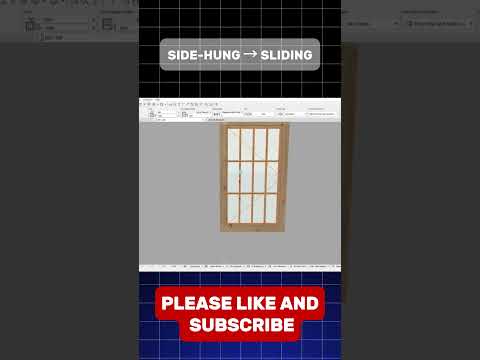
Creating realistic architectural visualizations often comes down to the smallest details. When working on a project, leaving windows strictly closed or uniformly static can make your rendered views look rigid and artificial. Fortunately, adjusting window opening angles is a simple yet powerful way to bring life, dynamism, and realism into your ArchiCAD 3D models.

In this quick guide, we’ll explore why customizing window angles matters and step through how to easily gain complete control over window appearances in your 3D views.

Why Customize Window Opening Angles?

Whether you are preparing a quick concept snapshot for a client or generating high-end architectural renders, small dynamic touches make a massive difference. Adjusting window angles allows you to:

  • Enhance Visual Realism: Open windows break up flat facade reflections, making buildings look lived-in and natural.
  • Showcase Functionality: Demonstrate how specific window types—such as casement, awning, or tilt-and-turn windows—operate in real life.
  • Improve Spatial Storytelling: Capture natural light entry and highlight airflow in your ArchiCAD 3D design presentations.

Step-by-Step: How to Adjust Window Angles in ArchiCAD

Taking control of your window angles takes just a few seconds once you know where to look:

  1. Select the Window: In your floor plan or 3D view, select the window object you want to adjust.
  2. Open Window Settings: Press Ctrl + T (Windows) or Cmd + T (Mac) to open the Window Selection Settings dialog box.
  3. Navigate to Custom Settings: Go to Window Settings and Openings under the main settings tree.
  4. Locate the Opening Angle Field: Look for the 3D Opening Angle parameter (often found under the Model Attributes or Opening options).
  5. Set Your Angle: Input your desired degree (e.g., 30°, 45°, or 90°) specifically for the 3D representation.
  6. Apply and View: Click OK and jump back into your viewport to see the transformed ArchiCAD 3D view instantly!

Pro Tip for a Faster Workflow

If you want to quickly edit window angles without opening the settings menu every time, use the dynamic editing hotspots directly in the 3D window. Simply select the window and drag the purple editing node to adjust the opening angle interactively!

Conclusion

Mastering small settings like window opening angles gives you total creative control over your architectural presentations. Try tweaking your window angles today and watch your 3D scenes instantly gain depth and character!

Continue Reading | ความคิดเห็น

How to Create Realistic Bedroom Interiors Using 3ds Max and D5 Render

Monday, October 12, 2026

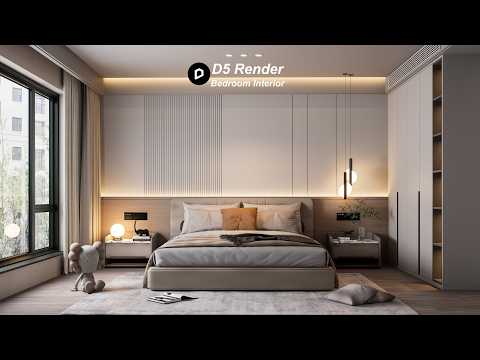
Creating photorealistic interior renders is an essential skill for modern 3D artists and interior designers. Whether you are building your geometry in 3ds Max or another modeling software, bringing your scene to life with realistic materials and lighting is where the real magic happens. In this guide, we will explore the step-by-step process of turning a bedroom scene into a breathtaking, lifelike rendering using D5 Render.

Step 1: Scene Preparation and Model Import

A convincing render begins with a well-detailed 3D model. High-poly assets—such as soft bedding, intricate light fixtures, and detailed furniture—add crucial realism to interior spaces. Once you have completed your initial architectural layout and furniture arrangement in 3ds Max, seamlessly export or sync the scene into D5 Render. Proper layering and material separation during the modeling phase will save you immense time during the texturing stage.

Step 2: Applying Realistic PBR Materials

Materials define how light interacts with your interior surfaces. To achieve maximum realism in a bedroom setting: - Fabrics & Linens: Use custom bump and normal maps to give blankets, pillows, and curtains tactile, soft textures. - Wood Surfaces: Apply high-resolution roughness maps to flooring and wooden furniture to capture realistic reflections and grain depth. - Glass & Metals: Fine-tune specular settings and metallic values on lamps, mirror frames, and window panes to create subtle specular highlights.

Step 3: Dialing in Natural and Artificial Lighting

Lighting makes or breaks interior visualization. Start by adjusting the sun direction to cast natural daylight through the bedroom windows. Soft skylight helps illuminate dark corners naturally without overexposing the scene. Next, add artificial light sources—such as warm spotlights near bedside lamps or subtle LED strips behind headboards—to add contrast, mood, and depth.

Step 4: Camera Setup and Final Output

To finish your bedroom visualization, adjust your camera angles to frame key design features. Set the focal length to mirror real-world architectural photography, avoiding unnatural lens distortion. Enable a subtle depth of field to draw focus to intricate design accents like decor pieces or fabric textures.

By pairing robust modeling techniques from 3ds Max with real-time rendering, you can create publication-ready bedroom interiors quickly and efficiently.

Continue Reading | ความคิดเห็น

Mastering Architectural Visualizations: How to Create Exploded Isometric Views in ArchiCAD 3D

Monday, September 21, 2026

In the competitive world of architectural design, the ability to communicate complex spatial ideas clearly is what sets a professional apart. While standard floor plans and sections provide essential technical data, they often fail to capture the structural "story" of a building. This is where exploded isometric axonometries become an invaluable tool for any architect or designer.

By breaking down a project into its constituent layers—showing how the foundation, walls, and roof assemblies interact—you provide a depth of understanding that a single 3D render cannot achieve. In this guide, we explore how you can leverage the power of ArchiCAD 3D to create these stunning visual representations for your next project.

Why Use Exploded Axonometries?

An exploded view is essentially a technical "dissection" of your project. It allows clients and collaborators to see the vertical relationship between different floors and structural systems simultaneously. Using an exploded format helps highlight specific details, such as interior circulation or material transitions, without losing the context of the entire building.

Step-by-Step: Creating Your Exploded View

The beauty of working with ArchiCAD 3D is that you don't have to dismantle your actual BIM model to create these views. Instead, you can utilize the "3D Document" feature and the "Layers" system to organize your elements.

  1. Isolate Your Elements: Use the Marquee tool or Layer Combinations to select the specific parts of the building you want to display.
  2. Adjust the 3D Projection: Set your view to an Isometric Axonometry. This ensures that all parallel lines remain parallel, which is the hallmark of a professional architectural diagram.
  3. The "Lifting" Process: Instead of moving the actual model components (which would ruin your floor plans), many experts recommend using the "3D Document" settings to offset the visual representation of certain levels or using the "3D Styles" to distinguish between structural layers.
  4. Refine the Aesthetics: Once your exploded view is positioned, adjust your shadows and contours to give the drawing a clean, crisp look.

Enhancing Professionalism with ArchiCAD 3D

One of the most significant advantages of using ArchiCAD 3D for these diagrams is the synchronization between your model and your visuals. If you change a wall thickness or a window position in your floor plan, your exploded isometric view can be updated automatically. This ensures that your artistic presentations remain 100% accurate to your technical documentation.

By mastering this technique, you can transform a standard presentation into an immersive visual experience that clearly demonstrates your design intent and technical expertise.

Continue Reading | ความคิดเห็น

Popular Posts Today

 
Support : 3Dcadbrowser | Grabcad | 3Dcontentcentral | D | E | F | G
Copyright © 2028. Engineering 3DCad Appication - All Rights Reserved