Cad 3D Category

Mastering Character Design: Creating a Funny Sci-Fi Head with ZBrush 3D

Friday, October 2, 2026

Creating characters doesn’t always have to be about gritty realism or terrifying monsters. Sometimes, the most memorable designs are those that spark a smile. In our latest step-by-step tutorial, we explore the lighter side of digital sculpting by crafting a quirky, funny sci-fi head. Using the powerful tools within ZBrush 3D, we break down the process of turning a simple sphere into a personality-filled extraterrestrial.

Finding Inspiration in the Stars

The beauty of science fiction is that there are no rules. When you are designing a "funny" character, you have the creative freedom to exaggerate features. Think about oversized eyes, asymmetrical ears, or even ridiculous facial expressions. The goal is to blend high-tech sci-fi elements with a sense of humor that resonates with the viewer.

Why ZBrush 3D is the Artist’s Choice

For digital sculptors, ZBrush 3D remains the industry standard for a reason. Its ability to handle millions of polygons while maintaining a smooth, tactile feel makes it the perfect environment for character art. Whether you are a beginner or a seasoned pro, the software’s intuitive brushes—like Move, Clay Buildup, and DamStandard—allow you to push and pull your digital clay until your character's personality starts to shine through.

Step-by-Step Character Foundations

Every great sculpt starts with a solid foundation. In this tutorial, we begin with "blocking out" the primary shapes. By focusing on the silhouette first, we ensure the character looks interesting from every angle. Once the base head is established, we move into the secondary forms, where we add those specific "funny" traits that give the alien its charm.

Adding the Sci-Fi Details

A sci-fi character isn't complete without some technological flair. We demonstrate how to integrate "hard surface" elements into your organic sculpt. From tiny cybernetic implants to unusual skin textures, these details provide a contrast that makes the character pop. By leveraging the advanced features of ZBrush 3D, you can easily transition between fleshy, organic shapes and sharp, mechanical parts.

Conclusion

Character creation is a journey of discovery. By following this step-by-step guide, you aren't just learning how to use software; you are learning how to tell a story through design. So, grab your stylus, fire up your workstation, and let’s start sculpting something out of this world!

Continue Reading | ความคิดเห็น

Unleash Your Creativity: A Comprehensive Guide to Our New Blender 3D Tutorial

Thursday, October 1, 2026

The world of digital art is expanding faster than ever, and at the heart of this revolution is Blender 3D. Whether you are an aspiring game developer, a hobbyist animator, or a professional designer, mastering this open-source powerhouse is one of the most valuable skills you can acquire in today’s creative economy. We are thrilled to announce that our latest comprehensive tutorial is officially out, designed to take your skills to the next level.

Why Choose Blender 3D for Your Projects?

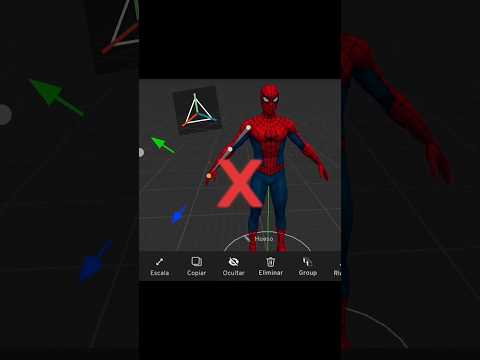
Blender 3D has evolved from a niche tool into a world-class suite capable of handling every stage of the 3D pipeline. From initial block-outs and intricate sculpting to complex rigging and cinematic rendering, it offers a versatility that few other programs can match. Our new tutorial focuses on the core pillars of the software: modeling, animation, and real-time interaction. By understanding these fundamentals, you can bridge the gap between a simple idea and a fully realized digital masterpiece.

What This Tutorial Covers

In this latest release, we dive deep into the workflow required to create high-quality assets. We begin with the essentials of 3D modeling, teaching you how to maintain clean topology and efficient workflows. We then transition into the world of animation, showing you how to breathe life into your static meshes using Blender’s robust keyframing and rigging tools.

For those interested in interactive media, we also touch upon the principles used in the Blender game engine environment. Understanding how models behave in a real-time setting is crucial for anyone looking to enter the gaming industry. We provide step-by-step instructions to ensure that even beginners can follow along while still offering "pro-tips" for seasoned veterans.

Elevate Your Workflow Today

The journey to becoming a proficient 3D artist is a marathon, not a sprint. However, having the right guidance can significantly shorten the learning curve. Our tutorial is structured to be "all killer, no filler," focusing on the techniques that professional artists use every day.

By the end of this guide, you will have a solid grasp of how to utilize Blender 3D to create, animate, and export your work for any platform. Don't let technical hurdles stand in the way of your vision. Head over to our channel, watch the full tutorial, and start building your own digital worlds today!

Continue Reading | ความคิดเห็น

Mastering Interior Design: How to Create a Stunning Living Area with SketchUp 3D

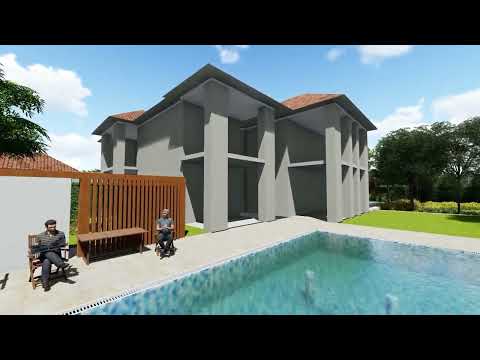
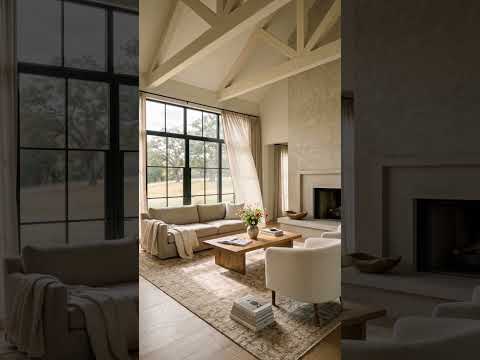
In the world of modern architecture and interior design, the ability to visualize a space before a single piece of furniture is moved is invaluable. Whether you are a professional designer or a DIY enthusiast, using SketchUp 3D has become the gold standard for turning abstract ideas into tangible, visual realities. Today, we’re diving into the process of creating a photorealistic living area that feels both cozy and professional.

The Foundation of Great Design

The journey begins with a solid model. A living area isn't just a box; it’s an ecosystem of light, space, and flow. By utilizing the intuitive tools within SketchUp 3D, you can quickly block out walls, windows, and doors to match real-world dimensions. The beauty of this software lies in its accessibility—you can move from a simple floor plan to a detailed 3D structure in a matter of minutes.

Once the shell of the room is complete, the focus shifts to the details. This is where you add character through furniture placement, decorative accents, and architectural moldings. A well-designed living room should balance aesthetics with functionality, and 3D modeling allows you to experiment with different layouts without any physical effort.

Bringing Realism with Textures and Lighting

A model is only as good as its finish. To truly impress clients or followers, you must bridge the gap between a digital sketch and a photorealistic image. This is where rendering engines like V-Ray come into play. By applying high-quality textures—such as grain-heavy wood for coffee tables or soft fabrics for sofas—you add layers of depth to your project.

Lighting is the final "secret ingredient." By simulating natural sunlight streaming through a window or the warm glow of an indoor lamp, you transform a flat model into a living, breathing space. Integrating these elements within your SketchUp 3D workflow ensures that your final render isn't just a picture, but an invitation into a home.

From Animation to Inspiration

Beyond static images, creating an animation of your living area model provides a cinematic experience. It allows viewers to "walk through" the space, feeling the scale and the atmosphere. By mastering these digital tools, you aren’t just drawing a room—you are storytelling. Start your next interior project today and see how digital modeling can elevate your creative vision to the next level.

Continue Reading | ความคิดเห็น

Mastering Mechanical Assembly: Step-by-Step Pipe Wrench in SolidWorks 3D

Designing mechanical components requires precision, especially when transitioning from individual part creation to complex mechanical assemblies. If you want to enhance your engineering portfolio and refine your CAD skills, learning how to build functional mechanisms is essential. In this project tutorial, we dive deep into assembling a classic mechanical tool: the Pipe Wrench using SolidWorks 3D.

Essential Steps for the Pipe Wrench Assembly

Assembling a pipe wrench involves several moving parts that must interact seamlessly, including the hook jaw, heel jaw, adjustment nut, and main handle structure. To achieve an accurate and functional model, precision mating and proper mechanical constraints are crucial.

Here are the core concepts covered in this project: - Inserting Base Components: Begin by positioning the main handle structure, establishing it as the fixed component to ground your assembly. - Applying Standard Mates: Utilize concentric, parallel, and coincident mates to align the movable jaws and threaded mechanisms correctly. - Simulating Mechanical Motion: Set up advanced or mechanical mates to create realistic sliding motion for the hook jaw and rotational movement for the adjustment nut.

Why Practice Complex Assemblies in SolidWorks 3D?

Working on practical, real-world projects like a pipe wrench allows engineers, designers, and students to move beyond basic sketch tools. Utilizing SolidWorks 3D for assembly design helps you identify potential component interferences, evaluate physical clearances, and understand how individual mechanical features function together in an industrial setting.

By mastering these fundamental assembly techniques, you gain a strong advantage when tackling advanced product design, mechanical engineering tasks, or complex hardware prototyping.

Conclusion

Whether you are a beginner looking to understand basic mate conditions or an intermediate user refining your CAD workflow, assembling a pipe wrench is an outstanding practice exercise. Follow along with our complete video tutorial to master mechanical mates and elevate your modeling expertise in SolidWorks 3D today!

Continue Reading | ความคิดเห็น

Popular Posts Today

 
Support : 3Dcadbrowser | Grabcad | 3Dcontentcentral | D | E | F | G
Copyright © 2028. Engineering 3DCad Appication - All Rights Reserved