Cad 3D Category

Showing posts with label Digital Art. Show all posts

The Cold Art of 3D Sculpting: Crafting Victor Fries in Nomad Sculpt

Tuesday, October 27, 2026
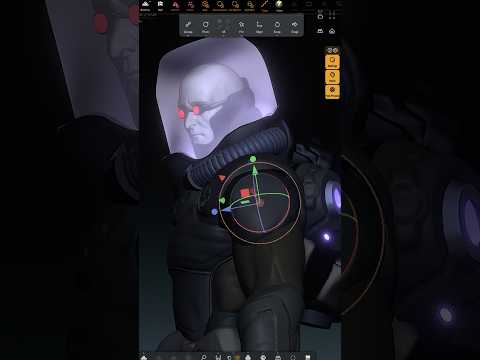
When it comes to Gotham City's dark and icy underworld, few villains are as tragic and visually iconic as Dr. Victor Fries, better known as Mr. Freeze. Bringing such a detailed comic character from two-dimensional concept art into a three-dimensional model requires technical precision, creative vision, and the right digital tools. Modern 3D sculpting allows artists to capture every chilling detail of Gotham's most infamous antagonist with unprecedented flexibility.

Bringing Gotham’s Coldest Villain to Life

Creating a compelling model of Victor Fries is all about balancing heavy mechanical armor with raw human emotion. The design process begins with blocking out the primary forms of his cryogenic suit—the reinforced shoulders, life-support mechanics, and distinct helmet structure.

By focusing on the subtle details of his expression, creators can convey the deep sorrow and cold determination that defines the character. Using digital brushes, artists carve sharp facial features, sunken eyes, and iconic comic book aesthetics that make Mr. Freeze instantly recognizable.

Mobile Workflows and Digital Clay

Mobile applications have completely transformed the 3D sculpting workflow, enabling digital artists to "cook up" complex character models directly on tablets using intuitive software like Nomad Sculpt. Gone are the days when high-end digital modeling strictly required a massive desktop workstation.

Tools like Nomad Sculpt provide powerful brush engines, dynamic topology, and real-time lighting previews in a portable package. This mobility makes it easier than ever to refine detailed character sculpts during quick work-in-progress (WIP) sessions, allowing creators to tweak proportions and polish hard-surface elements anywhere inspiration strikes.

Key Takeaways for Character Sculptors

If you are looking to create your own comic book fan art or character concepts, keep these helpful tips in mind:

  • Focus on the Silhouette: Ensure your character's overall shape and pose are strong before diving into secondary details.
  • Balance Organic and Hard-Surface Elements: Characters like Mr. Freeze require a seamless transition between organic skin textures and rigid armor plating.
  • Experiment with Atmosphere: Strategic lighting—especially cool-toned rim lights—can instantly elevate the mood of an icy sculpture.

Whether you are a beginner or an experienced practitioner, taking advantage of modern 3D sculpting on handheld devices opens up incredible new creative avenues. Pick up your stylus, launch your software, and start building your favorite comic legends in 3D today.


Continue Reading | ความคิดเห็น

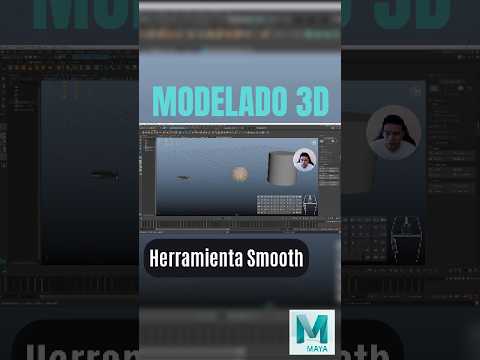
Mastering the Smooth Feature in Maya 3D: Why You Must Use It With Caution

Thursday, October 22, 2026

If you are diving into the world of 3D modeling, chances are you have encountered the Smooth button in Autodesk Maya. At first glance, it feels like magic: with a single click, a blocky, low-poly model turns into a sleek, organic surface. However, many beginners fall into the trap of using this feature without fully understanding what happens under the hood when working in Maya 3D.

What Does the Smooth Tool Really Do?

When you apply a Smooth operation, Maya does not just change how light hits your mesh—it actively modifies the underlying geometry. The Smooth function subdivides every face on your model into multiple smaller faces while averaging the position of the vertices.

In simple terms, it softens your shapes by creating actual, physical polygons. While this increases visual detail, it also dramatically inflates your overall polygon count.

The Hidden Dangers of Over-Smoothing

Why should 3D artists be careful with this tool? The main issue comes down to performance and workflow flexibility. Every time you subdivide geometry in Maya 3D, you exponentially increase the complexity of your scene.

  • Performance Drops: High polygon counts can slow down viewport performance, increase render times, and potentially cause software crashes.
  • Loss of Control: Once you smooth a mesh and clear your history, editing the base shape becomes exponentially harder. Tweaking a few vertices on a low-poly mesh is quick; adjusting hundreds of vertices on a smoothed mesh is a nightmare.
  • Pipeline Issues: For real-time applications like game engines, overly dense geometry creates severe optimization problems.

Smart Alternatives and Best Practices

To maintain full control over your models, adopt these professional practices:

  1. Use Display Smooth Preview (The '3' Key): Pressing 3 in Maya toggles a non-destructive smooth preview without altering your underlying geometry. This allows you to inspect your curved surfaces while keeping the base mesh easy to edit (press 1 to return to flat display).
  2. Smooth at the End: Only apply actual geometry subdivisions when you are completely finished editing the form, or during the high-poly creation stage for map baking.
  3. Maintain Clean Topology: Ensure your mesh consists primarily of quads (four-sided polygons) before applying Smooth, as triangles and n-gons will cause severe shading artifacts.

Understanding how geometry subdivides is essential for anyone aiming to master Maya 3D. By using the Smooth tool intentionally rather than reflexively, you will keep your scenes lightweight, your workflows flexible, and your final models production-ready.

Continue Reading | ความคิดเห็น

Unleashing Creativity with ZBrush 3D: A Showcase of My Latest Sculpts and Tips

Monday, September 21, 2026

Are you ready to dive into the mesmerizing world of digital sculpting? Whether you are a seasoned character designer or just beginning your journey in digital art, working with ZBrush 3D offers an unparalleled creative experience. Today, I am excited to share a showcase of my latest sculpts, along with a few essential tips to help you level up your digital sculpting workflow.

Bringing Characters to Life with ZBrush 3D

Creating detailed 3D models requires both artistic patience and the right set of tools. Over the past few months, I’ve been experimenting with dynamic forms, intricate textures, and detailed hard-surface elements. ZBrush 3D remains the industry-standard software for digital sculpting, allowing artists to translate raw imagination into high-poly, production-ready assets.

In my latest video, I walk you through several of my recent sculpted pieces. From initial block-outs using basic primitives to refining fine pore details and anatomical structures, each model represents a unique set of challenges and learning moments. Observing how light hits sculpted surfaces can dramatically change the impact of your artwork, making solid form and proportion crucial right from step one.

Quick Tips for a Better Sculpting Workflow

If you want to enhance your sculpting speed and quality, keep these core practices in mind:

  • Master the Blocking Phase: Never rush into high-subdivision details before your base mesh proportions are rock solid.
  • Leverage Custom Brushes: Build or collect custom brushes for repeated details like skin textures, fabric seams, and hair strands.
  • Utilize Dynamic Topology: Keep your topology flexible early in the process so you can sculpt freely without worrying about polygon distribution.

Join the Community and Support the Channel

Building a strong artistic foundation takes practice, but sharing the journey makes it far more rewarding. If you enjoyed taking a peek at these sculpts and found the insights helpful, be sure to like the video and subscribe to the channel for more tips and tricks. Also, don't forget to check out our brand-new Inglorious Merch line to gear up and support our growing creative community!

Continue Reading | ความคิดเห็น

Unlock Efficient 3D Modeling: How Mesh Design and Arrays Work Together

Wednesday, September 16, 2026

Creating detailed 3D models from scratch can often feel time-consuming and tedious. Fortunately, modern mesh design workflows leverage clever techniques like mesh arrays to streamline the creative process. Whether you are building intricate architecture or sci-fi environments, mastering array tactics will dramatically improve your 3D modeling pipeline.

Building Complexity with Mesh Arrays

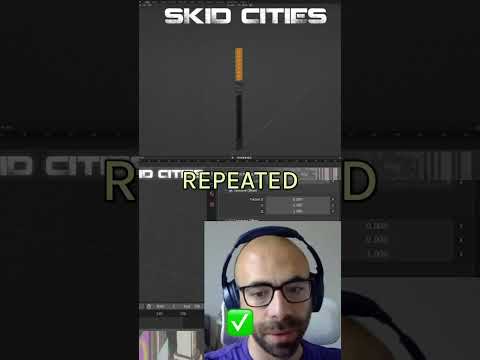
What exactly is a mesh array? Instead of manually copying, pasting, and placing individual objects, an array modifier allows you to repeat a single base object multiple times with exact precision. For instance, duplicating a single base mesh 14 times can instantly construct a complex structure—such as a futuristic corridor, a circular staircase, or a detailed industrial railing. By applying smart mesh design principles, you reduce file clutter, lower scene overhead, and save countless hours of manual alignment.

Effortless Editing and Seamless Updates

The real magic of using arrays lies in global editing. When working with linked instances, any tweak applied to the original base mesh automatically propagates across every single repeated instance in your scene.

If you decide to bevel an edge, adjust a vertex, or refine a bevel on the source piece, all 14 instances update instantly in real time. This dynamic approach completely eliminates repetitive design issues, ensuring perfect consistency throughout your entire project without forcing you to redo tedious work.

Elevate Your 3D Modeling Workflow

Don't let repetitive tasks slow down your artistic vision. By adopting array-based mesh design techniques, you can construct complex, highly detailed 3D environments in a fraction of the time while maintaining total editability over your final output. Start implementing mesh arrays today to make your digital design workflow smarter and much more efficient!

Continue Reading | ความคิดเห็น

Popular Posts Today

 
Support : 3Dcadbrowser | Grabcad | 3Dcontentcentral | D | E | F | G
Copyright © 2028. Engineering 3DCad Appication - All Rights Reserved