Cad 3D Category

Showing posts with label Character Design. Show all posts

Mastering 3D Character Animation in Blender: A Vibrant Candyland Showcase

Thursday, October 29, 2026
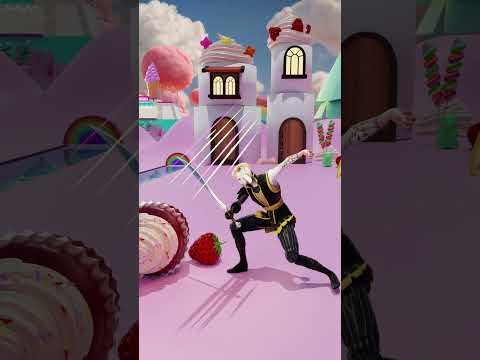
Imagine stepping into a world where sugary landscapes meet high-octane action. That is precisely the vision behind this latest animation showcase built inside Blender. By blending vibrant, candy-filled environments with swift combat moves and fluid dance routines, this project demonstrates the incredible creative freedom modern digital art tools offer.

Action Meets Whimsy: Combat and Choreography

Animating in a fantasy environment requires a careful balance between personality and motion. In this project, the primary goal was pushing the physical limits of a 3D character. The animation sequence transitions seamlessly from aggressive sword swings and acrobatic flips to lighthearted, expressive dance routines.

Contrasting intense swordplay with playful choreography gives the project a distinct rhythm. It proves that dynamic motion design isn't just about action—it is about conveying a hero's full personality through subtle secondary motions and dramatic poses.

Unleashing Creative Power with Blender

Blender continues to be an indispensable tool for indie game developers and digital artists alike. Creating smooth keyframe interactions within a detailed, candy-coated world presents fun challenges, particularly regarding lighting, material shading, and spatial awareness.

When rigging and animating a dynamic 3D character, precise weight painting and flexible armature setups are essential. Blender’s powerful timeline and pose tools allowed for quick iterations, making it easy to refine every sword arc, weight shift, and landing impact until the movement felt weightless yet impactful.

Elevating Indie Game Development

In the realm of game design, memorable movement is key to keeping players engaged. A well-designed 3D character must feel alive, whether performing intricate combat combos or celebrating a victory with an energetic dance. Exploring these varied motion cycles in a playful setting offers fantastic inspiration for future gaming projects.

Whether you are working on stylized cutscenes or fluid gameplay mechanics, pushing the boundaries of animation in Blender is one of the best ways to sharpen your pipeline. Stay tuned for more animation breakdowns as this sweet adventure continues to evolve!

Continue Reading | ความคิดเห็น

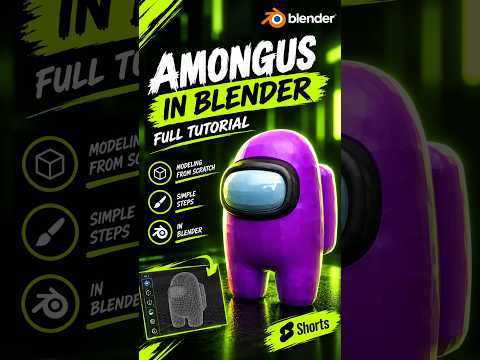
Master 3D Modeling: Creating Your Own Among Us Crewmate in Blender

Sunday, October 25, 2026

Among Us captured the world with its simple yet iconic designs and tense social gameplay. While we are all used to seeing the 2D sprites running around the Skeld, there is something incredibly satisfying about seeing those "sus" characters in a three-dimensional space. If you have ever wanted to transition from a player to a creator, learning the fundamentals of 3D modeling is the perfect place to start.

Why Start with an Among Us Character?

For beginners, the Among Us crewmate is one of the best subjects to practice with. Its design is comprised of simple, clean geometric shapes—essentially a rounded "bean" with a visor and a backpack. This simplicity allows you to focus on the core workflow of 3D modeling without getting overwhelmed by complex anatomy or intricate textures. By using Blender, a powerful and free open-source tool, you can go from a blank screen to a finished character in just one sitting.

The Basic Workflow in Blender

To begin, you typically start with a basic primitive, such as a cube or a UV sphere. By applying a Subdivision Surface modifier, you can transform a blocky shape into the smooth, pill-like body of the crewmate. The legs are created by extruding the bottom faces of the body, ensuring that the silhouette remains consistent with the original game art.

The visor is perhaps the most important detail. By selecting the front faces of your model and using the "Inset" and "Extrude" tools, you can create the recessed look of the glass. Adding a bevel to these edges helps catch the light, giving the model a more professional, polished feel.

Adding Color and Personality

Once the geometry is finished, the real fun begins with materials. Among Us characters are known for their vibrant, flat colors. In Blender’s shading tab, you can assign bright reds, cyans, or purples to the body while giving the visor a light blue, reflective material. Don't forget the oxygen tank on the back—a simple stretched cube with rounded corners is all you need to complete the iconic look.

Take the Next Step

Creating a crewmate is a fantastic way to build your confidence. Once you master the basics of 3D modeling through this project, you can start experimenting with custom hats, different skins, or even basic animations. The jump from 2D to 3D might seem intimidating at first, but with a character this simple and a tool like Blender, the possibilities are endless. Grab your mouse, fire up your software, and start creating!

Continue Reading | ความคิดเห็น

Mastering Quick Digital Sculpting: Creative Workflow Tips for ZBrush 3D

Saturday, October 24, 2026

In the world of digital art and character design, speed and flexibility are essential for bringing raw ideas to life. Digital sketching allows artists to rapidly explore forms, silhouettes, and creative concepts without getting bogged down in technical constraints. When it comes to organic sculpting and rapid concept development, ZBrush 3D stands out as the ultimate industry-standard software for digital artists worldwide.

Why Use ZBrush 3D for Rapid Concepting?

Unlike traditional 3D modeling applications that rely heavily on manual polygon placement, ZBrush 3D operates much like working with physical clay. This intuitive, artist-friendly approach makes it ideal for spontaneous creativity and quick sketch sessions. Features such as DynaMesh and Sculptris Pro allow creators to push, pull, and add geometry on the fly without worrying about underlying topology or mesh stretching.

Whether you are sketching a quick character bust, a creature concept, or a stylized prop, speed sculpting helps build artistic muscle memory. By treating your dynamic viewport like a digital sketchbook, you can focus entirely on primary shapes and proportions before committing to time-consuming micro-details.

Best Practices for Effective 3D Sketching Sessions

To maximize your efficiency during quick digital sculpting sessions, consider applying these essential techniques:

  • Start with Simple Block-outs: Utilize basic spheres, cylinders, or ZSpheres to establish primary shapes quickly before merging them into a single unified mesh.
  • Prioritize the Silhouette: Frequently check your model's silhouette from various angles to ensure your character or object has a clear and impactful visual gesture.
  • Delay High-Resolution Subdivisions: Keep your mesh resolution as low as possible for as long as possible. Focusing on primary and secondary forms early on ensures a stronger final sculpt.
  • Embrace Experimentation: Remember that sketch time is designed for freedom and exploration. Don't worry about clean edge loops or final renders during the conceptual stage.

Final Thoughts

Developing a regular habit of quick digital sketching is one of the most effective ways to elevate your overall 3D artwork. By harnessing the flexible sculpting toolset inside ZBrush 3D, you can translate rough ideas into stunning visual concepts in a fraction of the time. Grab your stylus, open up a fresh canvas, and start sculpting today!

Continue Reading | ความคิดเห็น

Master the Art of Digital Sculpting: Your Essential Guide to ZBrush 3D

Thursday, October 15, 2026

Digital sculpting has revolutionized the way we create characters, creatures, and environments for games and film. If you have ever wanted to dive into the world of digital clay, ZBrush 3D is the industry-standard software you need to master. While the interface might seem intimidating to a newcomer, breaking it down into fundamental steps will help you move from a blank canvas to a professional-grade asset in no time.

Navigating the Interface with Confidence

The first hurdle for any beginner is the unique workspace. Unlike traditional CAD software, the ZBrush interface is designed specifically for artists. To get started, you must familiarize yourself with the "Shelf" and the "Brush Palette." Learning how to navigate the 3D space—rotating, panning, and zooming—is essential. Once you have customized your UI to show your most-used tools, you will find that ZBrush 3D provides a remarkably fluid and intuitive creative experience.

Core Sculpting Techniques for Beginners

The magic of sculpting happens through various brushes, each serving a specific purpose. For those just starting out, you don't need to learn every tool at once. Focus on these three essentials: * Move Brush: Perfect for adjusting the overall silhouette and large forms of your model. * Clay Buildup Brush: Ideal for adding volume and "meat" to your sculpt, mimicking the feel of physical clay. * Standard Brush: Used for fine-tuning surfaces and adding specific details.

By alternating between these brushes and using the "Smooth" modifier, you can quickly define the anatomy or structure of your model.

Building Your First 3D Asset

Every masterpiece begins with a simple primitive, such as a sphere or a cube. Using the "Dynamesh" feature is a game-changer for beginners; it allows you to stretch and pull your model without worrying about the underlying polygon structure. This freedom lets you focus entirely on your artistic vision. As you refine your shape, you can increase the subdivision levels to add intricate details like skin pores, fabric folds, or mechanical edges.

Starting your journey in ZBrush 3D is an exciting step for any aspiring digital artist. By focusing on these fundamentals and practicing consistently, you will soon find that the software becomes a natural extension of your imagination. Grab your stylus, open up a new project, and start sculpting your first asset today!

Continue Reading | ความคิดเห็น

Master Game Character Creation in Blender: Step-by-Step 3D Tutorial

Saturday, September 26, 2026

Creating compelling video game characters is one of the most rewarding skills in modern game development. Blender, a powerful and free open-source software, offers all the industry-standard tools you need to bring your imagination to life. In this comprehensive 3D tutorial, we will explore the complete workflow for designing, modeling, and preparing high-quality character assets ready for modern game engines.

Step 1: Gathering References and Blocking Out the Base Mesh

Before diving into high-density sculpting, every great character starts with a solid foundation. Gather visual references, orthographic turnarounds, and mood boards to guide your vision. Inside Blender, begin by "blocking out" the primary forms using basic geometric primitives like cubes and cylinders. This initial phase focuses strictly on proportions and silhouette rather than fine details, ensuring a balanced anatomic structure from the start.

Step 2: Sculpting Details and Retopology

Once your base proportions are locked in, switch over to Blender’s powerful Sculpt Mode. Here, you can add organic forms, muscle definition, face features, and complex clothing folds. However, high-poly sculpted models contain millions of polygons, making them too heavy for real-time game performance.

Following a structured 3D tutorial pipeline, the next essential step is retopology. This involves creating a clean, low-poly mesh over your high-density sculpture. Pay close attention to edge loops around deforming areas like eyes, mouth, elbows, and knees to guarantee smooth deformation during animation.

Step 3: UV Unwrapping, Texturing, and Rigging

With your low-poly mesh finalized, perform UV unwrapping to flatten your 3D model into 2D space for texture mapping. You can then bake normal maps from your high-poly sculpt onto the low-poly surface, capturing all the fine details without increasing polygon count. Apply PBR (Physically Based Rendering) materials to give your character realistic skin, cloth, or metallic surfaces.

Finally, add a armature system (rig) and perform weight painting so your character can be posed and animated seamlessly in game engines like Unreal Engine or Unity.

Conclusion

Mastering game character creation requires practice, but breaking down the pipeline into manageable stages makes the process smooth and exciting. Utilizing this 3D tutorial workflow gives you a clear roadmap to turn raw concepts into functional, game-ready assets. Fire up Blender, start practicing, and bring your unique heroes and villains to life today!

Continue Reading | ความคิดเห็น

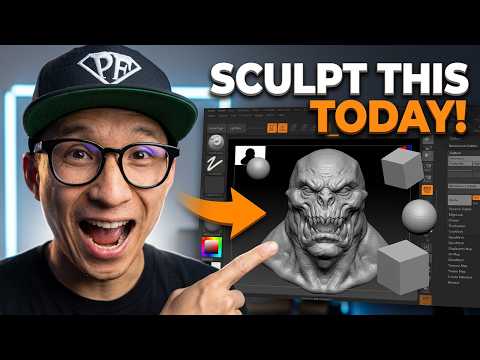
Unleashing Creativity with ZBrush 3D: A Showcase of My Latest Sculpts and Tips

Monday, September 21, 2026

Are you ready to dive into the mesmerizing world of digital sculpting? Whether you are a seasoned character designer or just beginning your journey in digital art, working with ZBrush 3D offers an unparalleled creative experience. Today, I am excited to share a showcase of my latest sculpts, along with a few essential tips to help you level up your digital sculpting workflow.

Bringing Characters to Life with ZBrush 3D

Creating detailed 3D models requires both artistic patience and the right set of tools. Over the past few months, I’ve been experimenting with dynamic forms, intricate textures, and detailed hard-surface elements. ZBrush 3D remains the industry-standard software for digital sculpting, allowing artists to translate raw imagination into high-poly, production-ready assets.

In my latest video, I walk you through several of my recent sculpted pieces. From initial block-outs using basic primitives to refining fine pore details and anatomical structures, each model represents a unique set of challenges and learning moments. Observing how light hits sculpted surfaces can dramatically change the impact of your artwork, making solid form and proportion crucial right from step one.

Quick Tips for a Better Sculpting Workflow

If you want to enhance your sculpting speed and quality, keep these core practices in mind:

  • Master the Blocking Phase: Never rush into high-subdivision details before your base mesh proportions are rock solid.
  • Leverage Custom Brushes: Build or collect custom brushes for repeated details like skin textures, fabric seams, and hair strands.
  • Utilize Dynamic Topology: Keep your topology flexible early in the process so you can sculpt freely without worrying about polygon distribution.

Join the Community and Support the Channel

Building a strong artistic foundation takes practice, but sharing the journey makes it far more rewarding. If you enjoyed taking a peek at these sculpts and found the insights helpful, be sure to like the video and subscribe to the channel for more tips and tricks. Also, don't forget to check out our brand-new Inglorious Merch line to gear up and support our growing creative community!

Continue Reading | ความคิดเห็น

Free Iron Man MK 45 3D Model Download - High Detail Cinematic Asset

Monday, April 27, 2026

If you are looking for a high-quality Iron Man MK 45 3D model for your next CGI project or 3D printing hobby, you've come to the right place. This iconic suit from the Avengers era is known for its sleek design and advanced aesthetics.

High-Quality MK 45 3D Asset

This 3D model captures the essence of the Mark XLV armor with intricate detailing. Whether you are a fan of the Marvel Cinematic Universe or a professional 3D artist, having this model in your library is a must. It is perfect for rendering practice, animation tests, or as a base for custom suit designs.

Key Features:

  • Highly Detailed Geometry: Optimized for realistic light reflection and textures.
  • Multiple Formats: Compatible with major software like Blender, 3ds Max, and Maya.
  • Iconic Design: Accurate representation of the MK 45 cinematic suit.

Ready to get started?

Click the button below to access the download page and add this masterpiece to your collection.

DOWNLOAD FREE 3D MODEL

Free 3D Models, Iron Man, Marvel, MK 45, CGI, FBX, OBJ, Character Design

Continue Reading | ความคิดเห็น

Popular Posts Today

 
Support : 3Dcadbrowser | Grabcad | 3Dcontentcentral | D | E | F | G
Copyright © 2028. Engineering 3DCad Appication - All Rights Reserved