Cad 3D Category

Showing posts with label Game Development. Show all posts

Why Your Unity Objects Turn Pink: A Quick 3D Tutorial to Fix Shader Errors

Thursday, November 12, 2026
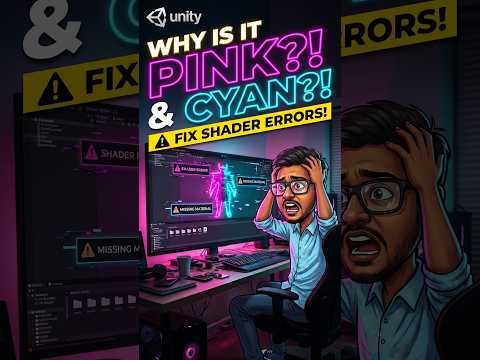
If you have ever imported a 3D model into Unity only to be greeted by a glaring, bright pink or cyan texture, don't panic! You haven't broken your project. This alarming "magenta screen of death" on 3D meshes is one of the most common issues beginners encounter when setting up game environments.

In this quick 3D tutorial, we will break down why your objects turn pink or cyan in Unity and show you how to fix them in just a few clicks.

Why Do Unity Objects Turn Magenta or Cyan?

The neon pink or cyan color in Unity is an automatic fallback indicator used to alert you to a missing, broken, or incompatible shader. Shaders are small scripts that dictate how light, reflection, and textures render on a surface.

The two main reasons this happens are: 1. Render Pipeline Mismatch: You imported an asset created for the legacy Built-in Render Pipeline into a project using the Universal Render Pipeline (URP) or High Definition Render Pipeline (HDRP). 2. Missing Shader References: The material reference was lost during the export or import process from your 3D modeling software.

How to Fix Pink Objects in Unity

Method 1: Automatically Upgrade Materials (For URP/HDRP)

If your project uses URP or HDRP, Unity provides an automated tool to upgrade broken materials. 1. Go to the top menu bar and select Edit > Rendering > Materials. 2. Choose Convert Selected Built-in Materials to URP (or select Convert All Built-in Materials to URP if your whole scene is pink). 3. Confirm the conversion prompt.

Method 2: Manually Reassign the Shader

Whether you are following a step-by-step 3D tutorial or building a game from scratch, manually reassigning shaders is a useful skill to master when automatic tools fail. 1. Click on the pink object in your Hierarchy or Scene view. 2. In the Inspector panel, scroll down to find the Material assigned to the object. 3. Click the Shader dropdown menu (which likely displays Hidden/InternalErrorShader). 4. Reassign it to a working shader compatible with your pipeline, such as Universal Render Pipeline/Lit or Standard.

Final Thoughts

Encountering missing shader errors can be frustrating when building your game assets, but fixing them is simple once you understand how materials interact with Unity's render pipelines. Troubleshooting these common pitfalls is an essential part of any developer's journey, and hopefully, this 3D tutorial helped clear up your scene! Keep building, and turn those broken pink meshes into stunning game worlds.


Continue Reading | ความคิดเห็น

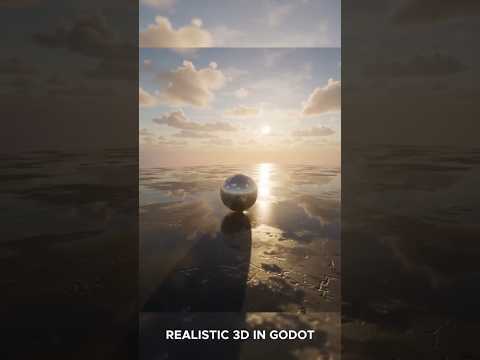
How to Build a Stunning 3D Environment in Godot Fast

Tuesday, November 10, 2026

Creating immersive games starts with building atmospheric worlds that captivate players from the very first frame. If you are using the Godot Engine, setting up your own realistic 3D environment is much easier than you might think. Whether you are working on a quick indie project or a full-scale game, mastering environment design in Godot will elevate your visual quality instantly.

Step 1: Set Up Your Core Lighting and WorldEnvironment

The foundation of any breathtaking scene in Godot relies heavily on the WorldEnvironment node and proper lighting. Start by adding a WorldEnvironment node to your main 3D scene. This node acts as the central control hub for background settings, ambient light, and sky configurations.

To achieve realistic lighting quickly: - Use HDRI Skyboxes: Import a high-quality HDRI texture into a PanoramaSkyMaterial. This provides natural, realistic ambient light and reflections across all your game assets. - Configure DirectionalLight3D: Add a DirectionalLight3D node to simulate sunlight or key atmospheric lighting. Enable shadows and adjust energy levels to define clear depth and contrast.

Step 2: Assemble Your World Assets and Materials

Once your lighting foundation is established, it is time to build the actual terrain and structures. Using modular 3D models makes populating your scene quick and efficient. Bring in your terrain meshes, props, vegetation, and architectural elements. Pay close attention to texture maps—using PBR (Physically Based Rendering) materials with proper albedo, roughness, and normal maps will make your 3D environment look polished and professional.

Don't forget post-processing effects! Godot offers built-in visual enhancements such as Glow, Screen Space Ambient Occlusion (SSAO), and Volumetric Fog. Enabling these features adds immediate depth and mood to your level.

Step 3: Optimize for Smooth Performance

A visual masterpiece must also run smoothly on target devices. As you refine your 3D environment, keep performance optimization at the forefront of your process: - Bake Global Illumination: Use VoxelGI or LightmapGI for static geometry to render complex global lighting without draining hardware resources. - Implement Occlusion Culling and LODs: Hide objects that are outside the camera's view and use Level of Detail meshes to maintain high frame rates.

Start Building Today

Creating custom game worlds in Godot doesn't have to take weeks. By combining clever lighting techniques, quality materials, and subtle post-processing, you can craft captivating game spaces fast. Jump into Godot today and turn your creative vision into reality!

Continue Reading | ความคิดเห็น

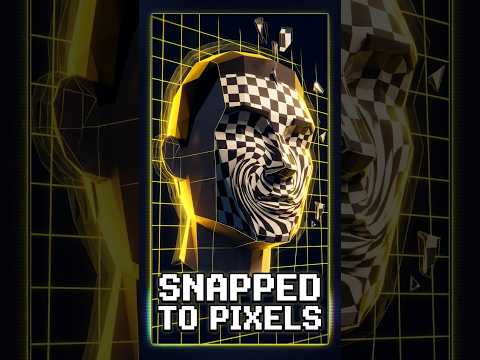
Why PS1 Graphics Jitter: The Technical Secret Behind Retro 3D Texture Warping

If you grew up gaming in the mid-1990s, the original PlayStation (PS1) likely holds a special place in your heart. However, replaying those classic 32-bit titles today highlights a very distinct visual quirk: 3D models tend to wobble, and wall surfaces seem to "swim" as your character moves. But what actually caused this iconic phenomenon?

The answer lies in the hardware limitations of the early 3D console era and how the system processed geometric data.

Affine Mapping and the "Swimming" Effect

The main reason graphics appear to stretch and warp on the PS1 comes down to how polygons were rendered on screen. Modern graphics hardware uses perspective-correct texture mapping, which continuously calculates depth along the Z-axis for every pixel.

The PS1 graphics chip, however, lacked hardware support for perspective correction. Instead of calculating true 3D perspective for a 3D texture, the console used a lightweight rendering technique called affine texture mapping. Affine mapping maps textures linearly across 2D polygons on the screen. As an object moves closer to or farther from the camera, the hardware fails to account for depth changes, causing the 3D texture to warp and distort across the surface of the geometry.

Fixed-Point Math and Vertex Wobble

Along with texture warping, PS1 games are famous for their jittery 3D models. This visual glitch stems from the console's reliance on fixed-point math rather than floating-point math within its Geometry Transfer Engine (GTE).

Because the hardware lacked floating-point precision, 3D vertex coordinates had to be rounded to the nearest pixel grid coordinate on the screen. As a character or camera shifted, vertex points would violently "snap" to the nearest integer pixel rather than transitioning smoothly across sub-pixels. This sub-pixel snapping created the noticeable shaking or wobbling effect retro gamers know so well.

Furthermore, the PS1 lacked a dedicated Z-buffer (depth buffer) to keep track of depth ordering. Developers had to manually sort polygons from back to front using ordering tables, which often caused textures and polygons to flicker or pop through one another when rendered closely together.

The Legacy of 32-Bit Rendering

Despite these technical constraints, developers crafted legendary titles by employing creative workarounds, such as subdividing large polygons into smaller pieces or utilizing heavy draw-distance fog.

Today, what was once a visual flaw has evolved into a beloved stylistic choice for modern indie horror games. Learning how early hardware rendered every 3D texture gives us a fresh appreciation for the pioneering developers who laid the groundwork for modern graphics.

Continue Reading | ความคิดเห็น

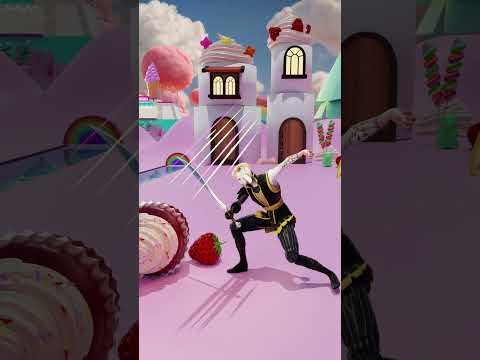
Mastering 3D Character Animation in Blender: A Vibrant Candyland Showcase

Thursday, October 29, 2026

Imagine stepping into a world where sugary landscapes meet high-octane action. That is precisely the vision behind this latest animation showcase built inside Blender. By blending vibrant, candy-filled environments with swift combat moves and fluid dance routines, this project demonstrates the incredible creative freedom modern digital art tools offer.

Action Meets Whimsy: Combat and Choreography

Animating in a fantasy environment requires a careful balance between personality and motion. In this project, the primary goal was pushing the physical limits of a 3D character. The animation sequence transitions seamlessly from aggressive sword swings and acrobatic flips to lighthearted, expressive dance routines.

Contrasting intense swordplay with playful choreography gives the project a distinct rhythm. It proves that dynamic motion design isn't just about action—it is about conveying a hero's full personality through subtle secondary motions and dramatic poses.

Unleashing Creative Power with Blender

Blender continues to be an indispensable tool for indie game developers and digital artists alike. Creating smooth keyframe interactions within a detailed, candy-coated world presents fun challenges, particularly regarding lighting, material shading, and spatial awareness.

When rigging and animating a dynamic 3D character, precise weight painting and flexible armature setups are essential. Blender’s powerful timeline and pose tools allowed for quick iterations, making it easy to refine every sword arc, weight shift, and landing impact until the movement felt weightless yet impactful.

Elevating Indie Game Development

In the realm of game design, memorable movement is key to keeping players engaged. A well-designed 3D character must feel alive, whether performing intricate combat combos or celebrating a victory with an energetic dance. Exploring these varied motion cycles in a playful setting offers fantastic inspiration for future gaming projects.

Whether you are working on stylized cutscenes or fluid gameplay mechanics, pushing the boundaries of animation in Blender is one of the best ways to sharpen your pipeline. Stay tuned for more animation breakdowns as this sweet adventure continues to evolve!

Continue Reading | ความคิดเห็น

How to Successfully Sell Your First 3D Asset for Video Games

Wednesday, October 28, 2026

The indie game development scene is booming, creating an insatiable demand for high-quality, ready-to-use game art. If you are a 3D artist looking to turn your digital creations into a sustainable source of income, knowing how to prepare and market your work is essential. Creating a high-quality 3D asset for video games is only half the battle; the real secret lies in optimizing your models for developers.

Here are essential tips to help you successfully sell your 3D models on popular digital marketplaces.

1. Optimize for Real-Time Performance

Game developers prioritize performance and integration ease. A buyer will quickly leave a negative review if your mesh causes lag or requires extensive cleanup. Make sure every 3D asset you list meets standard technical criteria: - Clean Topology: Keep geometry efficient, avoiding unnecessary n-gons and messy edge loops. - Efficient UV Mapping: Maximize texture space usage and place seams strategically to avoid visual artifacts. - Include LODs (Level of Detail): Providing low-polygon variants allows developers to use your model in large, open-world environments without sacrificing frame rates.

2. Master Your Product Presentation

Visual appeal is what drives clicks. A poorly lit preview image will turn potential buyers away, even if the underlying model is technically flawless. - Provide Diverse Render Previews: Include fully lit material renders, clay renders, and clean wireframe views so buyers can inspect your mesh quality. - Showcase Scale and Rigging: If applicable, include a scale reference grid or a short animation preview to demonstrate how the asset behaves in motion. - Write Clear Technical Specifications: Always list vertex counts, texture map resolutions (e.g., 2K, 4K), and available file formats like FBX, OBJ, or GLTF.

3. Target the Right Marketplaces

Do not restrict your work to a single site. Distributing your 3D asset across multiple popular platforms—such as the Unity Asset Store, Unreal Engine Marketplace, CGTrader, and TurboSquid—maximizes your visibility and potential revenue streams.

Final Thoughts

Selling game assets is a continuous learning process. By focusing on clean optimization, transparent technical descriptions, and professional visual previews, you can build a reliable catalog that game developers will return to time and time again.

Continue Reading | ความคิดเห็น

Unleash Your Creativity: A Comprehensive Guide to Our New Blender 3D Tutorial

Thursday, October 1, 2026

The world of digital art is expanding faster than ever, and at the heart of this revolution is Blender 3D. Whether you are an aspiring game developer, a hobbyist animator, or a professional designer, mastering this open-source powerhouse is one of the most valuable skills you can acquire in today’s creative economy. We are thrilled to announce that our latest comprehensive tutorial is officially out, designed to take your skills to the next level.

Why Choose Blender 3D for Your Projects?

Blender 3D has evolved from a niche tool into a world-class suite capable of handling every stage of the 3D pipeline. From initial block-outs and intricate sculpting to complex rigging and cinematic rendering, it offers a versatility that few other programs can match. Our new tutorial focuses on the core pillars of the software: modeling, animation, and real-time interaction. By understanding these fundamentals, you can bridge the gap between a simple idea and a fully realized digital masterpiece.

What This Tutorial Covers

In this latest release, we dive deep into the workflow required to create high-quality assets. We begin with the essentials of 3D modeling, teaching you how to maintain clean topology and efficient workflows. We then transition into the world of animation, showing you how to breathe life into your static meshes using Blender’s robust keyframing and rigging tools.

For those interested in interactive media, we also touch upon the principles used in the Blender game engine environment. Understanding how models behave in a real-time setting is crucial for anyone looking to enter the gaming industry. We provide step-by-step instructions to ensure that even beginners can follow along while still offering "pro-tips" for seasoned veterans.

Elevate Your Workflow Today

The journey to becoming a proficient 3D artist is a marathon, not a sprint. However, having the right guidance can significantly shorten the learning curve. Our tutorial is structured to be "all killer, no filler," focusing on the techniques that professional artists use every day.

By the end of this guide, you will have a solid grasp of how to utilize Blender 3D to create, animate, and export your work for any platform. Don't let technical hurdles stand in the way of your vision. Head over to our channel, watch the full tutorial, and start building your own digital worlds today!

Continue Reading | ความคิดเห็น

Star Wars Droideka 3D Model: High-Detail Asset for Blender, Unreal & 3ds Max

Wednesday, September 9, 2026

Preview Image

Enhance your sci-fi renderings, game development, and animation projects with this iconic Star Wars Droideka (Destroyer Droid) 3D Model. Designed with high-precision geometry, this versatile 3D asset captures the distinct mechanical detailing of the Trade Federation's formidable combat droid, ready for integration into major 3D creation suites.

Key Features & Technical Specs:

  • Multi-Software Compatibility: Fully adaptable for 3ds Max, Maya, Blender, Cinema 4D, Unreal Engine, and Unity pipelines.
  • Detailed Mechanical Geometry: Accurately rendered hard-surface components ideal for close-up shots and high-resolution visual effects (VFX).
  • Game & VR/AR Ready: Optimized structure suitable for real-time engines, virtual reality applications, and interactive experiences.
  • Flexible Pipeline Use: Easily riggable and ready for texturing, lighting, and animation setups.

Recommended Applications:

Whether you are producing fan-made cinematic trailers, building immersive sci-fi environments, or studying complex mechanical 3D modeling techniques, this Droideka model serves as a robust asset for your digital content creation (DCC) workflow.


Continue Reading | ความคิดเห็น

Industrial Robot Arm 3D Model: High-Detail Asset for CAD, Blender & Game Engines

Tuesday, September 8, 2026

Preview Image

High-Detail Industrial Robot Arm 3D Model

Enhance your industrial visualizations, robotics simulations, and sci-fi game environments with this versatile Robot Arm 3D Model. Designed for high compatibility and performance, this mechanical asset is perfect for engineers, 3D animators, and game developers alike.

Key Features & Technical Compatibility:

  • Multi-Platform Support: Fully compatible with leading 3D software including 3ds Max, Maya, Blender, and Cinema 4D.
  • Real-Time & VR Ready: Prepped for seamless import into Unreal Engine and Unity for game development and interactive VR simulations.
  • Mechanical Design: Detailed joint articulation and realistic structural components suited for engineering visualization.

Download this essential robotic asset to streamline your workflow and elevate your rendering and CAD projects.


Continue Reading | ความคิดเห็น

Mechanical Spider Robot 3D Model for CAD, VR & Game Engines

Sunday, September 6, 2026

Preview Image

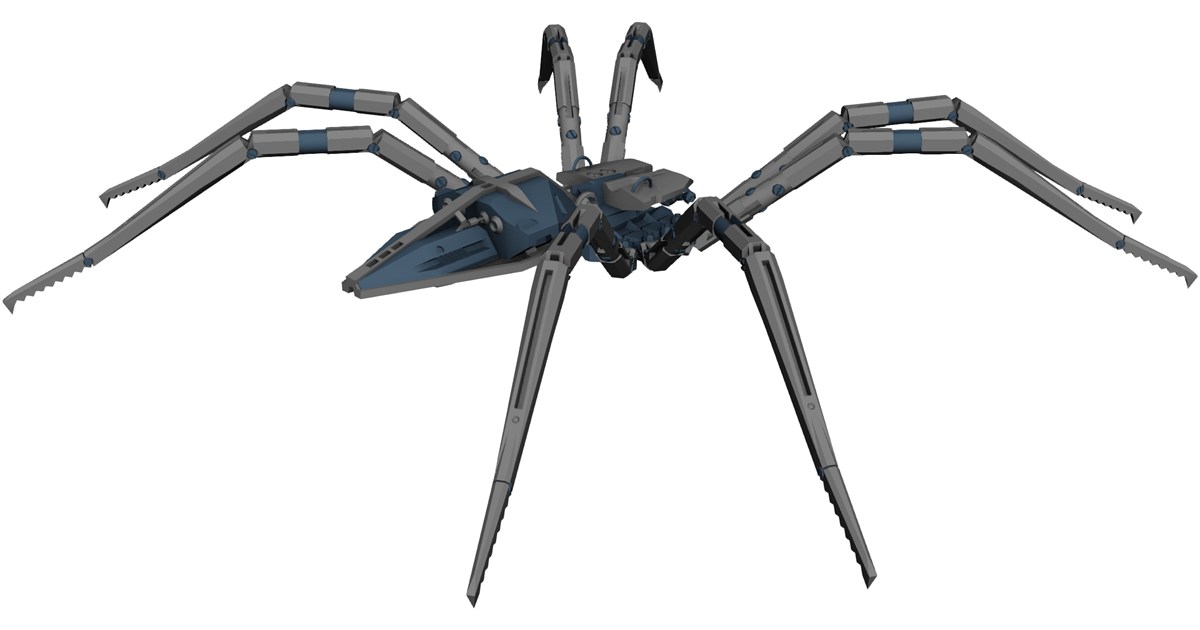
Enhance your sci-fi environments, game development, or mechanical simulation projects with this high-detail Mechanical Spider Robot 3D Model. Designed for versatility across major 3D design and render engines, this asset provides a robust framework for animators, rigging artists, and digital developers.

Key Features & Specifications:

  • Universal Compatibility: Works seamlessly with 3ds Max, Maya, Blender, Cinema 4D, Unreal Engine, Unity, and standard CAD/3D packages.
  • Intricate Mechanical Detail: Features articulation-ready leg joints, pneumatic hydraulics, and detailed chassis geometry ideal for close-up renders.
  • Optimized Mesh: Balanced polygon structure optimized for both real-time game engines (VR/AR) and high-end visual effects rendering.
  • Multi-Use Asset: Perfect for futuristic game environments, sci-fi concept art, automated robotics visualization, and mechanical design references.

Download the Mechanical Spider Robot 3D model today to streamline your 3D workflow and elevate your technical visualization projects.


Continue Reading | ความคิดเห็น

Popular Posts Today

 
Support : 3Dcadbrowser | Grabcad | 3Dcontentcentral | D | E | F | G
Copyright © 2028. Engineering 3DCad Appication - All Rights Reserved