Cad 3D Category

Showing posts with label 3D Animation. Show all posts

Unlock the Magic of Autodesk 3D: Essential Low-Poly Modeling Tips

Saturday, November 14, 2026
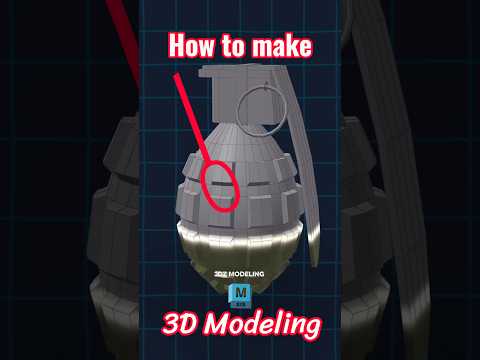
Have you ever watched a digital artist transform a simple geometric block into a captivating visual piece and thought, "How did they do that?" That instant transformation—the "wait for it" moment—is what makes digital art so satisfying. Whether you are a beginner stepping into digital art or a seasoned creator looking to refine your skills, leveraging Autodesk 3D software like Maya opens up endless creative possibilities.

In this article, we’ll explore the fundamentals of low-poly modeling and how you can streamline your workflow to create stunning 3D assets effortlessly.

The Charm of Low-Poly Design in Maya

Low-poly modeling isn't just a trendy aesthetic choice; it is a fundamental technique used extensively in video game development, real-time rendering, and stylized animations. By focusing on essential geometry and minimal polygon counts, artists can craft clean, lightweight models without sacrificing artistic style or visual impact.

When modeling in Maya, mastering simple tools like extrusions, bevels, and edge loops forms the bedrock of great design. The efficiency of low-poly assets allows artists to quickly prototype ideas, build expansive environments, and prepare models for seamless rigging and motion.

Bringing Your Creations to Life

Modeling is only half the journey. What truly captivates an audience is seeing a static mesh spring into motion. Utilizing Autodesk 3D tools enables animators to set keyframes, refine motion curves, and apply dynamic lighting that instantly elevates low-poly scenes into eye-catching animations.

Here are a few essential tips to boost your modeling workflow: - Maintain Clean Topology: Ensure your mesh uses clean quads to make rigging and animating much smoother. - Optimize Your UV Maps: Efficient UV unwrapping ensures textures fit perfectly without stretching across low-poly surfaces. - Play with Lighting: Simple multi-light setups can add dramatic depth, shadows, and mood to stylized renders.

Final Thoughts

Mastering 3D creation takes patience and practice, but with the powerful capabilities of Autodesk 3D software, you can turn basic geometric shapes into extraordinary artwork. Keep experimenting with low-poly techniques, practice your animation timing, and enjoy the process of creating visuals that make your audience pause and take notice!

Continue Reading | ความคิดเห็น

Awakening: Bringing a Hyper-Realistic 3D Character to Life in CGI

Wednesday, November 11, 2026

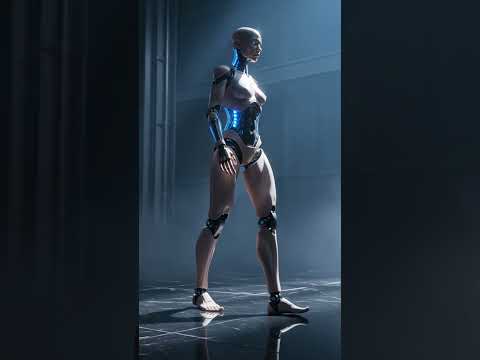
Imagine a world where the boundary between organic life and artificial intelligence blurs completely. "She wasn't supposed to wake up"—yet, in the breathtaking short film Awakening: Genesis in Steel and Skin, a hyper-realistic android opens her eyes for the very first time. This cinematic project showcases the astonishing potential of modern computer graphics, immersive storytelling, and cutting-edge visual effects.

The Art of Hyper-Realistic Digital Design

Creating a believable synthetic human is one of the most challenging feats in modern digital art. Crafting a hyper-realistic 3D character requires far more than just high-resolution textures; it demands an intricate understanding of human anatomy, subsurface light scattering, and subtle emotional expression. In Awakening, the contrast between sleek, cold steel components and soft, lifelike skin creates a striking visual dichotomy. Every pore, metallic reflection, and micro-expression works in harmony to bridge the gap between artificiality and humanity.

Breathing Life into Motion and Animation

Visual design is only half the journey. To truly captivate an audience, a digital entity must move with purpose and delicate realism. Animating a lifelike 3D character involves capturing the hesitant, fragile nature of a newly awakened consciousness taking her very first steps. By utilizing advanced rigging and high-end rendering techniques, the short film transforms a complex digital mesh into a compelling figure with a soul-stirring presence. The surrounding visual effects seamlessly integrate ambient lighting and atmospheric depth, elevating the narrative experience.

A New Era for Cinematic AI and CGI

As technology continues to evolve rapidly, the intersection of innovative AI tools and traditional 3D animation opens up limitless possibilities for creators. Projects like Awakening demonstrate how visionary artists can now produce Hollywood-grade cinematic experiences independently. Seeing a fully realized 3D character push the boundaries of digital storytelling inspires a new generation of animators and CGI enthusiasts alike.

Experience the dramatic first steps of this synthetic marvel and witness the future of digital art unfolding before your eyes.

Continue Reading | ความคิดเห็น

Day Zero Survival Guide: How 3D Animation Teaches Zombie Travel Tactics

Sunday, November 8, 2026

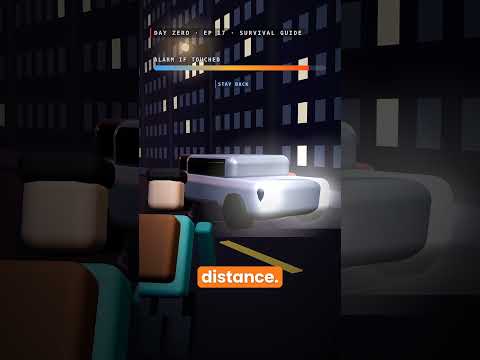
Leaving a collapse-ridden city during an outbreak is one of the most dangerous maneuvers in any apocalyptic scenario. The open road looks tempting, but as highlighted in Season 3 of Day Zero: Survival Guide, you are rarely alone out there. Fortunately, modern 3D animation allows creators to visualize these life-or-death tactical strategies with breathtaking realism, helping audiences understand the crucial steps needed to stay alive when society crumbles.

Essential Rules for Traveling Through Undead Territory

When evacuating an urban area, chaos is your biggest enemy. To minimize casualties and avoid attracting unwanted attention, survivors must follow strict movement protocols:

  • Walk in Single File: Moving in a single line drastically reduces your group’s visual footprint, making it much harder for roaming hordes or hostile scavengers to spot your movement from a distance.
  • Maintain a Five-Meter Distance: Keeping five meters apart ensures that if one team member is ambushed or stumbles into a trap, the rest of the squad isn't caught in the crossfire. It also provides everyone with enough operational space to draw weapons and react effectively.

Bringing Tactical Realism to Life

Text guides and verbal warnings can only convey so much. Through high-quality 3D animation, viewers can visually grasp the spatial awareness, line-of-sight angles, and movement formations required when navigating treacherous landscapes. Cinematic rendering brings every abandoned highway, desolate field, and lurking threat to life, giving audiences a front-row seat to practical apocalypse survival.

Navigating the Open Road Safely

Leaving the urban core behind is only the first step. Highways are often cluttered with abandoned vehicles, unexpected chokepoints, and hidden dangers around every curve. By maintaining strict discipline, keeping safe intervals, and constantly scanning your surroundings, your group drastically increases its odds of reaching the next safe zone intact.

Whether you are a fan of post-apocalyptic lore or an enthusiast of immersive visual storytelling, following these fundamental movement rules is your best shot at making it through Day Zero and beyond.

Continue Reading | ความคิดเห็น

Mastering Soft Body Physics: A Deep Dive into 3D Modeling and Simulation

Friday, November 6, 2026

Have you ever wondered how digital objects squash, stretch, and bounce so realistically in modern animations? Physics simulations have revolutionized digital art, allowing creators to craft hyper-realistic or delightfully satisfying visual experiences. One of the most fascinating areas to explore within 3D modeling is soft body dynamics—specifically how extreme parameter settings transform simple shape collisions.

What is Soft Body Simulation?

In popular software suites like Blender and Cinema 4D, soft body simulation mimics real-world deformable materials. Instead of treating shapes like solid, unyielding blocks, soft body physics enables meshes to flex, compress, and react dynamically upon impact.

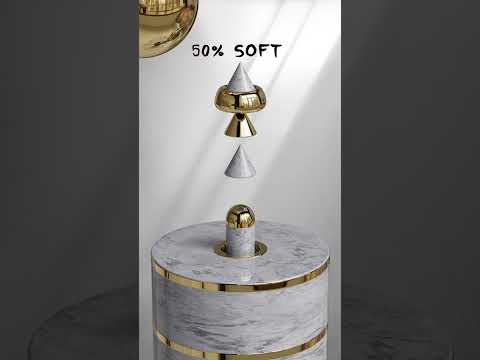
When running a collision experiment—such as a cone interacting with a torus shape—adjusting values from 0% to 100% dramatically alters the physical behavior:

  • 0% Stiffness (Maximum Flexibility): The object behaves like liquid jelly or loose rubber, deforming instantly and squishy upon contact.
  • 100% Stiffness (Maximum Rigidity): The shape maintains its structural form, behaving more like firm foam or solid rubber while absorbing minimal shock.

Why Parameter Testing Matters in 3D Modeling

Understanding these extreme boundary values is crucial for artists aiming to refine their technical toolkit. By testing 0% versus 100% configuration values, creators learn how to fine-tune elasticity, mass, and damping to hit the exact aesthetic sweet spot. Modern 3D modeling relies heavily on these physics engines to create convincing materials ranging from soft clothing and organic tissue to high-tech rubber components.

Beyond the technical benefits, these soft body experiments are undeniably hypnotic to watch. The visual contrast between complete structural collapse and rigid resilience makes for engaging, satisfying video content that captures audience attention.

Elevating Your Animations with Physics Dynamics

Whether you work with Blender, C4D, or Maya, experimenting with soft body interactions is one of the quickest ways to bring static geometric primitives to life. By combining simple shapes like cones and toruses with realistic force settings, contemporary 3D modeling allows digital artists to convert simple mesh collisions into captivating work. Open up your simulation panel today and start experimenting with soft body parameters to see what satisfying animations you can create!

Continue Reading | ความคิดเห็น

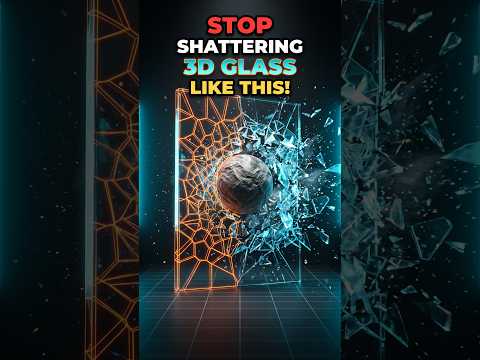
Master Realistic Glass Destruction: The Ultimate Blender 3D Tutorial

Thursday, November 5, 2026

Have you ever tried to create a shattering glass effect, only to find that it looks more like falling blocks than actual shards? You aren’t alone. Achieving high-quality, believable destruction is one of the most sought-after skills in the world of CGI. When it comes to creating high-end visual effects, mastering Blender 3D requires moving beyond basic presets and understanding how materials actually break in the real world.

The Problem with Basic Shattering

Most beginners make the mistake of creating uniform pieces that lack the chaotic variety of real glass. Real glass doesn't just split into equal cubes; it splinters into jagged shards, tiny slivers, and larger chunks based on the point of impact. If your simulation looks "off," it’s likely because the fracture pattern is too predictable. To fix this, we need to leverage the right tools and physics settings.

Step 1: Harnessing the Power of Cell Fracture

The secret to realistic destruction lies in the Cell Fracture add-on. Before you start, ensure the add-on is enabled in your preferences. Once active, you can take your mesh and apply the fracture.

The key tip here is to use a "Particle System" or "Annotation Tool" to define where the impact happens. By concentrating the fracture points around the area where the object hits the glass, you create a much more realistic radial pattern. Within the Cell Fracture settings, increasing the "Noise" value is essential—it ensures that the edges of your shards are jagged and irregular rather than perfectly straight.

Step 2: Refining Physics with Rigid Bodies

Once your glass is fractured, you need to tell the software how those pieces should move. This is where the physics engine in Blender 3D shines. By assigning a Rigid Body to your shards, you can simulate gravity, friction, and collision.

Pro-Tip: Use the "Calculate Mass" function to ensure the shards have a realistic weight. Light glass shards should behave differently than heavy concrete chunks. Additionally, don't forget to set your "Collision Margin" to a very low number to avoid shards "exploding" outward the moment the animation starts.

Final Touches for Realism

To truly sell the effect, add a touch of "Slow Motion" by adjusting the scene's time scale, and ensure your glass material has a high transmissive value with a touch of roughness on the broken edges.

Elevate your Blender 3D projects today by moving away from generic shattering and embracing the precision of Cell Fracture. With these techniques, your destruction sequences will go from "amateur" to "cinematic" in no time!

Continue Reading | ความคิดเห็น

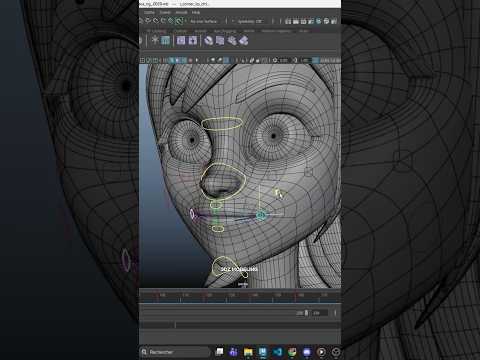
The Magic of Facial Rigging: How to Bring Characters to Life in Maya 3D

Monday, November 2, 2026

In the world of 3D animation, creating a compelling character model is only half the journey. The true magic happens when that character begins to express emotion, speak, and truly connect with the audience. Facial rigging is the vital bridge between a static 3D mesh and a living, breathing digital persona. By setting up complex expressions and intuitive controls, artists using Maya 3D can give digital characters a soul and bring their stories to life.

Why Facial Rigging Matters in Animation

Facial rigging involves constructing a digital skeleton and control system beneath a character's facial mesh. While body rigging focuses on large movements like walking or running, facial rigging deals with micro-expressions—the subtle arch of an eyebrow, the slight smirk of a lip, or the gentle squint of the eyes.

Without a well-designed rig, even the most detailed 3D sculpt remains stiff and emotionless. A high-quality facial rig allows animators to convey delicate storytelling nuances, transforming a generic digital asset into an unforgettable character that resonates deeply with viewers.

Crafting Expressive Rigging Systems in Maya 3D

When it comes to professional character setup, Maya 3D remains the industry-standard software for artists and animation studios worldwide. Its robust toolset enables riggers to combine blend shapes (shape keys) with joint-based rigging techniques seamlessly.

Blend shapes work exceptionally well for sculpting specific organic facial targets, such as smiles, frowns, or phonemes for lip-syncing. Meanwhile, joint-based controls provide dynamic flexibility for structural movements, such as jaw opening, tongue articulation, and cheek deformation. Utilizing the powerful node hierarchy and custom control curves within Maya 3D, riggers can build clean, user-friendly control panels that make the animation workflow smooth and expressive.

Elevate Your 3D Character Work

Mastering the art of facial rigging requires patience, continuous practice, and a keen eye for human anatomy and movement. Observing real-life facial mechanics and translating those subtle details into digital controls is what separates beginner work from professional quality.

Whether you are a hobbyist or an aspiring professional, taking the time to master character rigging will dramatically elevate the production value of your projects. Keep pushing your creative boundaries, study facial anatomy, and continue exploring the endless possibilities of 3D animation!

Continue Reading | ความคิดเห็น

Mastering 3D Character Animation in Blender: A Vibrant Candyland Showcase

Thursday, October 29, 2026

Imagine stepping into a world where sugary landscapes meet high-octane action. That is precisely the vision behind this latest animation showcase built inside Blender. By blending vibrant, candy-filled environments with swift combat moves and fluid dance routines, this project demonstrates the incredible creative freedom modern digital art tools offer.

Action Meets Whimsy: Combat and Choreography

Animating in a fantasy environment requires a careful balance between personality and motion. In this project, the primary goal was pushing the physical limits of a 3D character. The animation sequence transitions seamlessly from aggressive sword swings and acrobatic flips to lighthearted, expressive dance routines.

Contrasting intense swordplay with playful choreography gives the project a distinct rhythm. It proves that dynamic motion design isn't just about action—it is about conveying a hero's full personality through subtle secondary motions and dramatic poses.

Unleashing Creative Power with Blender

Blender continues to be an indispensable tool for indie game developers and digital artists alike. Creating smooth keyframe interactions within a detailed, candy-coated world presents fun challenges, particularly regarding lighting, material shading, and spatial awareness.

When rigging and animating a dynamic 3D character, precise weight painting and flexible armature setups are essential. Blender’s powerful timeline and pose tools allowed for quick iterations, making it easy to refine every sword arc, weight shift, and landing impact until the movement felt weightless yet impactful.

Elevating Indie Game Development

In the realm of game design, memorable movement is key to keeping players engaged. A well-designed 3D character must feel alive, whether performing intricate combat combos or celebrating a victory with an energetic dance. Exploring these varied motion cycles in a playful setting offers fantastic inspiration for future gaming projects.

Whether you are working on stylized cutscenes or fluid gameplay mechanics, pushing the boundaries of animation in Blender is one of the best ways to sharpen your pipeline. Stay tuned for more animation breakdowns as this sweet adventure continues to evolve!

Continue Reading | ความคิดเห็น

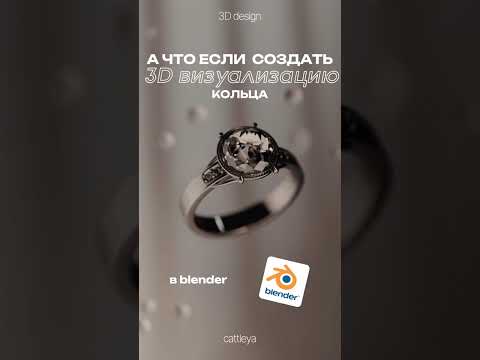
Stunning Jewelry Renderings: The Power of 3D Visualization in Blender

Tuesday, October 27, 2026

In the world of fine craft and luxury design, presentation is everything. Traditionally, showcasing high-end jewelry required physical samples, complex studio lighting, and expensive photo shoots. Today, digital tools have reshaped the creative process. With powerful open-source software like Blender, artists and jewelers can achieve breathtaking 3D visualization that captures every sparkle, reflection, and intricate detail of a ring long before physical production even begins.

Why Blender is Ideal for Jewelry Rendering

Blender has evolved into an industry powerhouse for creators looking to craft photorealistic digital assets. When working with jewelry, precision and lighting are paramount. Blender’s rendering engine enables designers to accurately simulate real-world light physics, glass refractions, and metallic surfaces like gold, silver, and platinum.

By applying custom material nodes, artists can capture the brilliance of precious gems and the subtle surface details of polished metal. Paired with smooth camera movement and cinematic close-up animations, static jewelry designs are transformed into dynamic visual experiences that captivate viewers.

Streamlining Design and Digital Marketing

Integrating high-quality 3D visualization into a jewelry design workflow provides key creative and business advantages:

  • Cost-Effective Prototyping: Designers can experiment with gemstone cuts, metal finishes, and settings virtually, saving significantly on physical manufacturing costs.
  • Engaging Social Content: Eye-catching 3D animations engineered for short-form video platforms like YouTube Shorts and Instagram Reels help creators instantly capture audience attention.
  • Pre-Visualization for Clients: Photorealistic renders allow bespoke jewelry clients to preview and approve custom pieces with full confidence prior to casting.

The Future of Digital Jewelry Creation

As digital artistry continues to blur the line between virtual models and reality, adopting modern tools is essential for content creators and brands alike. Whether you are a 3D animator building a portfolio or a commercial jeweler expanding your digital catalog, leveraging 3D visualization opens up infinite creative possibilities.

Start exploring Blender's powerful lighting and shading tools today, and bring your luxury jewelry concepts to life in vibrant 3D detail.

Continue Reading | ความคิดเห็น

4 Effective Home Remedies for Cold and Cough Made Simple with 3D Animation

Monday, October 26, 2026

Catching a cold or dealing with a persistent cough can disrupt your daily routine. While pharmaceuticals offer temporary relief, age-old home remedies provide a natural, holistic way to boost your immunity and soothe uncomfortable symptoms. To make these health practices easy to understand, modern content creators use 3D animation to visually demonstrate how natural ingredients interact with our bodies.

Here are four simple, highly effective home remedies to help you recover quickly from a cold or cough:

1. Warm Ginger and Honey Tea

Ginger contains powerful anti-inflammatory and antiviral properties that soothe an irritated throat and reduce chest congestion. Mixing crushed fresh ginger with a teaspoon of pure honey creates a comforting tonic. Honey acts as a natural cough suppressant, gently coating the throat to reduce tickling and inflammation.

2. Steam Inhalation

Nasal congestion is often the most frustrating cold symptom. Inhaling steam infused with a pinch of carom seeds (ajwain) or a few drops of eucalyptus oil helps open up blocked nasal passages instantly. The warm moisture loosens stubborn mucus and restores comfortable breathing within minutes.

3. Golden Turmeric Milk

Turmeric is famous for its active compound curcumin, which boasts strong antibacterial and immunity-boosting capabilities. Drinking a warm glass of milk mixed with half a teaspoon of turmeric before bedtime calms coughing fits, fights infection, and promotes restful sleep for faster recovery.

4. Warm Saltwater Gargle

A timeless natural cure, gargling with warm salt water reduces swelling in the throat tissues and flushes out bacteria. Simply dissolve half a teaspoon of salt in a glass of lukewarm water and gargle two to three times a day for swift sore throat relief.

The Power of Visualizing Health Tips

Health advice is far easier to follow when you can see the science in action. Short health guides powered by 3D animation break down complex bodily functions into vivid, engaging visuals. Watching how natural ingredients help clear airways or neutralize toxins makes adopting healthy habits fun and memorable for all ages.

Conclusion

Seasonal colds are inevitable, but natural relief is always within your reach. Try these four time-tested remedies at the first sign of a sniffle, and let your body heal naturally!

Continue Reading | ความคิดเห็น

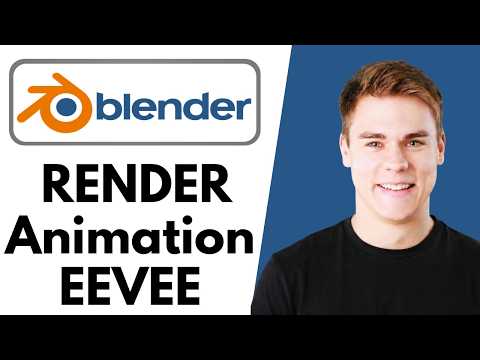
Master Blender 3D: The Ultimate Guide to Lightning-Fast Eevee Renders in 2026

Saturday, October 24, 2026

In the fast-paced world of digital creation, time is your most valuable resource. While Eevee is celebrated for its near real-time performance, complex scenes can still lead to frustratingly long wait times. If you want to push your productivity to the limit, mastering the art of optimization within Blender 3D is essential. This guide covers the most effective strategies to slash your render times in 2026 without sacrificing visual fidelity.

Optimize Your Sampling and Denoising

One of the most common mistakes beginners make is setting sample counts unnecessarily high. For Eevee, there is often a point of diminishing returns. Start by lowering your render samples and utilizing the improved denoising algorithms available in the latest version of Blender 3D. Often, 64 or 128 samples are more than enough for a clean animation when combined with a well-configured temporal denoiser, which prevents the "flickering" effect common in lower-sample renders.

Manage Screen Space Effects Wisely

Screen Space Reflections (SSR) and Ambient Occlusion (AO) provide the "pop" in Eevee, but they are also resource-intensive. To speed things up, check your "Half Res Trace" settings under the Screen Space Reflections tab. This renders reflections at half the resolution, significantly boosting speed while remaining barely noticeable in moving animations. Additionally, ensure that your "Trace Precision" is only as high as absolutely necessary for the specific shot.

Streamline Your Textures and Geometry

Large, uncompressed 4K textures can choke your GPU memory, leading to slowdowns or crashes. For background objects that aren’t the focus of the shot, use 1K or 2K textures instead. Similarly, utilize the Decimate modifier on high-poly assets that are far from the camera. Reducing the overhead on your hardware allows Blender 3D to process frames much faster, especially during complex sequences with multiple moving parts.

Leverage Simplify and Performance Settings

Don’t forget the "Simplify" panel in the Scene properties. This feature allows you to globally cap texture sizes and sub-division levels for the entire scene during the render process. Furthermore, ensure your GPU drivers are updated and that Blender is correctly utilizing your hardware's full potential in the System Preferences.

By implementing these practical workflow adjustments, you can transform your rendering process from a bottleneck into a competitive advantage. Happy blending!

Continue Reading | ความคิดเห็น

How to Easily Rig a 3D Character in Prisma 3D 3.3

Monday, October 19, 2026

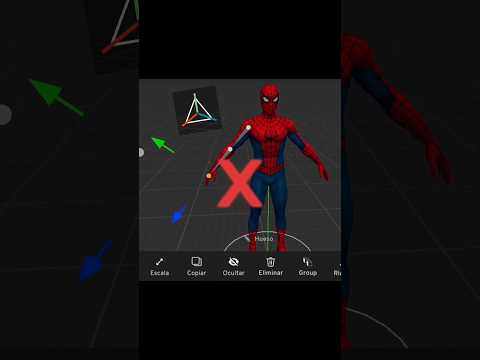
Are you struggling to make your mobile 3D animations look smooth and realistic? If your models end up stretching unnaturally or bending in weird angles, chances are you are setting up your armatures incorrectly. Rigging is the foundational process of adding a skeleton to your digital mesh, and mastering it is essential if you want to bring your 3D character to life seamlessly.

Fortunately, with the release of Prisma 3D version 3.3, mobile rigging has become significantly easier and faster. Here is a quick guide on how to avoid common mistakes and utilize the built-in auto-rigging tools like a professional.

Why Traditional Mobile Rigging Fails

Manual bone placement on a mobile device can be frustrating and prone to error. Beginners often place joint pivots outside of the mesh geometry, create broken parent-child hierarchies, or assign improper weight paints. These mistakes lead to unnatural deformations and glitchy animations when moving arms and legs.

Step-by-Step Auto-Rigging in Prisma 3D

The auto-rig feature in Prisma 3D 3.3 simplifies the technical setup so you can focus on creative animation. Here is the proper workflow to prepare a 3D character for posing:

  1. Prepare Your Mesh: Ensure your model is exported in a standard T-pose or A-pose with clean geometry before importing it into Prisma 3D.
  2. Enable Auto-Rig: Access the rigging tools in version 3.3 and select the Auto-Rig feature.
  3. Position Reference Points: Align the joint guides carefully with anatomical pivot points such as shoulders, elbows, hips, and knees.
  4. Generate and Inspect: Generate the bone structure and immediately enter Pose Mode to test the range of motion.

Pro Tips for Smoother Deformations

Even with automated tools, a quick manual inspection makes a massive difference. Always inspect joint rotations from multiple angles. If you notice strange mesh pulling around the shoulders or waist, adjust the guide positions slightly before finalizing the rig.

By applying these simple steps, you can save hours of tedious manual setup and turn any model into a fully poseable 3D character ready for action. Stop struggling with broken rigs and level up your mobile 3D workflow today!

Continue Reading | ความคิดเห็น

How to Create a Magical 3D Environment in Blender: A Beginner's Step-by-Step Guide

Sunday, October 18, 2026

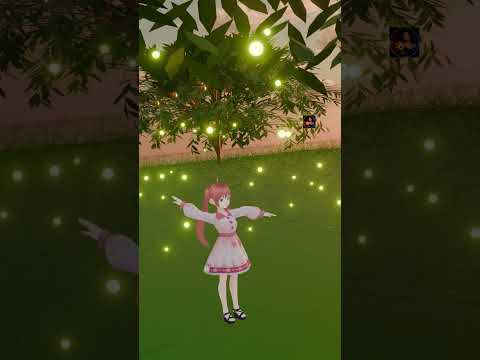
Have you ever wanted to bring your imagination to life through digital art? Creating a magical, atmosphere-rich 3D environment might seem daunting at first, but with Blender, it is easier and more accessible than ever. Whether you are an absolute beginner or looking to sharpen your digital art skills, learning step-by-step can help you master 3D animation without feeling overwhelmed.

In this guide, we will explore how you can create an enchanting, glowing firefly scene from scratch using Blender's powerful set of free tools.

Setting Up Your Magical Scene in Blender

To build a stunning 3D environment, you need to start with the fundamentals of composition and lighting. Begin by modeling simple background elements such as trees, grass, or stylized terrain to give your scene a solid structural base.

Lighting plays a crucial role in establishing mood. For a night scene featuring fireflies, you will want a dark, moody ambient light contrasted by warm, glowing focal points. Blender's render engines make it easy to tweak materials, shadows, and atmospheric fog, giving your digital world a truly immersive, cinematic feel.

Adding Magic with Glowing Fireflies

The real magic happens when you introduce the fireflies. Instead of placing each glowing orb manually, you can utilize Blender's built-in particle system. By creating a simple sphere with an Emission shader and distributing it across your scene, you can instantly transform a basic landscape into a whimsical fantasy world.

Adjusting the particle settings and adding subtle force fields will give your fireflies realistic, gentle floating movements that bring the entire animation to life.

Start Your 3D Animation Journey Today

Mastering Blender takes practice, but breaking down complex tools into manageable steps makes the process fun and rewarding. Designing your very first 3D environment is just the beginning of what you can accomplish in 3D animation. Dive in, experiment with lights and shaders, and start turning your creative ideas into breathtaking visual realities!

Continue Reading | ความคิดเห็น

How a Torn Patellar Tendon is Repaired: A Step-by-Step 3D Animation Guide

Saturday, October 17, 2026

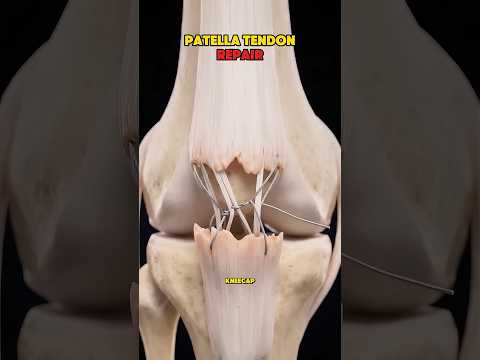
The patellar tendon plays a crucial role in our everyday mobility. Positioned right below your kneecap, this strong cord of tissue connects the patella (kneecap) to the tibia (shin bone), allowing you to straighten your knee, run, jump, and walk smoothly. But what happens when this vital structure tears, and how do medical professionals fix it?

What Happens When a Patellar Tendon Tears?

When a patellar tendon tears completely, it is a severe and debilitating injury. Because the connection between the quadriceps muscle and the lower leg is severed, extending your knee becomes almost impossible. Most people report feeling a sudden tearing sensation or hearing a loud pop, followed by immediate severe pain, swelling, and an inability to bear weight on the affected leg. Can you walk with a torn patellar tendon? In most cases, definitely not.

How Surgeons Fix It: The Surgical Process

Treating a complete rupture almost always requires prompt orthopedic surgery. But how exactly do surgeons repair such a high-stress connection? Using advanced 3D animation, we can take a clear look inside the knee to see how the repair works step-by-step:

  1. Preparing the Bone: The orthopedic surgeon locates the torn tendon and cleans the bottom edge of the kneecap (patella) to create a clean surface for reattachment.
  2. Placing Anchors or Drilling Channels: Surgeons either drill small, precise tunnels through the kneecap or insert specialized suture anchors directly into the bone.
  3. Suturing the Tendon: High-strength surgical threads are carefully woven through the torn patellar tendon.
  4. Reattachment: The sutures are pulled tightly through the bone tunnels or secured to the anchors, drawing the tendon tightly back against the kneecap so it can heal naturally.

The Value of 3D Animation in Medical Education

Understanding orthopedic surgery can be intimidating for patients. Medical 3D animation bridges the gap between complex anatomical terminology and visual understanding. By illustrating precise surgical techniques without the graphic nature of real surgery footage, 3D animation helps patients visualize their treatment plan and feel more confident about their recovery.

Recovery and Rehabilitation

Healing from patellar tendon surgery takes time and patience. Following surgery, the leg is placed in a protective brace to keep it straight while the reattached tendon firmly anchors back to the bone. Physical therapy gradually introduces controlled movement to rebuild quadriceps strength and restore full range of motion, eventually getting patients back on their feet.

Continue Reading | ความคิดเห็น

Mastering the Art of Animation: A Comprehensive Guide to Maya 3D

Monday, October 12, 2026

The world of digital content creation has evolved rapidly, moving from simple 2D graphics to immersive, lifelike experiences. At the heart of this revolution is 3D animation, a field that combines technical precision with limitless artistic creativity. Whether you are an aspiring filmmaker, a game developer, or a hobbyist looking to bring your imagination to life, learning the right tools is the first step toward success.

Why Choose Maya 3D for Your Animation Journey?

When it comes to professional-grade software, Maya 3D stands as the industry standard. Used by top-tier studios like Disney, Pixar, and Sony Pictures, this software provides a robust suite of tools for modeling, simulation, and rendering. The reason many professionals prefer Maya 3D is its sheer versatility; it allows creators to handle everything from complex character rigging to hyper-realistic fluid simulations. For anyone serious about a career in visual effects or gaming, mastering this platform is often considered a prerequisite.

Getting Started with the Basics

Transitioning into the 3D space can feel overwhelming at first. However, the key is to break the process down into manageable stages. Every great 3D project follows a specific pipeline: 1. Modeling: Creating the basic shape and geometry of your object. 2. Texturing: Adding colors, patterns, and materials to make the model look real. 3. Rigging: Building a digital skeleton so the model can move. 4. Animation: Bringing the character or object to life through movement.

By focusing on these core pillars within Maya 3D, beginners can slowly build their confidence and move from creating simple spheres to complex, animated environments.

Tips for Faster Learning

To excel in 3D animation, consistency is more important than raw talent. Start by following structured tutorials that focus on the user interface and basic navigation. Don't be afraid to experiment with lighting and camera angles, as these elements significantly impact the final "feel" of your video. Furthermore, engaging with online communities and specialized courses can help you troubleshoot common rendering issues and stay updated with the latest industry plugins.

The journey into 3D creation is a marathon, not a sprint. With patience and the right tools, you can transform a blank digital canvas into a cinematic masterpiece. Start your journey today and unlock the incredible potential of professional animation.

Continue Reading | ความคิดเห็น

Step-by-Step 3D Tutorial: How to Create Islamic Cartoon Rhymes for Kids

Friday, October 9, 2026

Creating engaging, educational content for young minds is one of the most rewarding pursuits in digital media today. Islamic nursery rhymes and animated stories are currently in high demand, helping children learn valuable moral lessons through colorful visuals and catchy melodies. If you have ever wanted to craft your own animations, this beginner-friendly 3D tutorial will walk you through the complete process of bringing Islamic cartoon rhymes to life.

1. Scripting and Storyboarding

Before jumping into software, start with a solid foundation. Choose a traditional rhyme or write a simple script focusing on positive values, such as kindness, daily prayers, or sharing. Outline a scene-by-scene storyboard to plan your camera angles, character movements, and visual cues. Having a visual blueprint keeps your project organized and saves significant production time later on.

2. Character Design and Asset Creation

The visual appeal of your cartoon depends heavily on child-friendly aesthetic choices. Design bright, expressive characters with modest, colorful attire. You can build custom models or utilize pre-made 3D asset libraries to speed up your workflow. Following a structured 3D tutorial approach helps you set up clean, peaceful environments—like vibrant parks or cozy rooms—that instantly capture a child's imagination.

3. Animation, Lip-Syncing, and Audio Integration

Once your models and environments are ready, it is time to bring everything to life. Animate your characters to match the rhythm of your chosen nursery rhyme. Pay close attention to energetic body language and accurate lip-syncing so the characters feel lively. Finally, layer in high-quality voiceovers, sound effects, and pleasant background music to complete the experience.

Final Thoughts

Creating animated Islamic nursery rhymes is a wonderful way to blend technology with positive educational values. By applying the techniques covered in this 3D tutorial, you can start producing charming, high-quality animations that entertain and inspire young viewers around the globe. Start creating today!

Continue Reading | ความคิดเห็น

Master 3D Animation: A Complete Guide to Creating and Monetizing Viral Content

Sunday, October 4, 2026

In the rapidly evolving world of digital content, visual storytelling has taken a massive leap forward. Among the most engaging formats available today, 3D animation stands out as a powerhouse for capturing audience attention and driving significant engagement. Whether you are a budding YouTuber or a digital marketer, learning how to create high-quality animated content is no longer a luxury—it is a vital skill for success.

The Rise of 3D Content in the AI Era

Gone are the days when you needed a massive studio and a team of experts to produce professional-grade visuals. With the advent of advanced AI tools and user-friendly software, creating 3D animation has become accessible to everyone. These tools allow creators to generate realistic characters, immersive environments, and fluid movements with just a few clicks. This shift has opened the doors for individual creators to compete with large production houses, bringing unique stories to life from the comfort of their homes.

How to Get Started with Your First Project

To begin your journey, you first need to identify the right tools that fit your workflow. Many modern platforms leverage artificial intelligence to automate the more technical aspects of the process, such as rigging and rendering.

  1. Scripting and Storyboarding: Every great video starts with a solid concept. Outline your story and visualize the scenes before you start animating.
  2. Character Design: Use AI-driven platforms to customize your characters. Focus on expressive features that resonate with your target audience.
  3. Animation and Voiceover: Add life to your characters by syncing their movements with high-quality voiceovers. This is where your 3D animation truly begins to take shape.

Strategies for Monetization

The ultimate goal for many creators is to turn their passion into a sustainable income. Once you have mastered the art of animation, there are several avenues to explore:

  • YouTube Partner Program: By creating consistent, high-quality animated series or educational content, you can qualify for ad revenue and channel memberships.
  • Freelancing: Many businesses are looking for talented animators to create promotional videos, social media ads, and product demos.
  • Brand Collaborations: As your influence grows, brands will pay a premium to be featured in your unique animated world.

By staying consistent and focusing on high-production value, you can transform your creative hobby into a profitable business. The world of digital media is waiting for your next big creation!

Continue Reading | ความคิดเห็น

Mastering Hand Gestures: How to Bring Your 3D Character to Life Without a Face

Friday, September 25, 2026

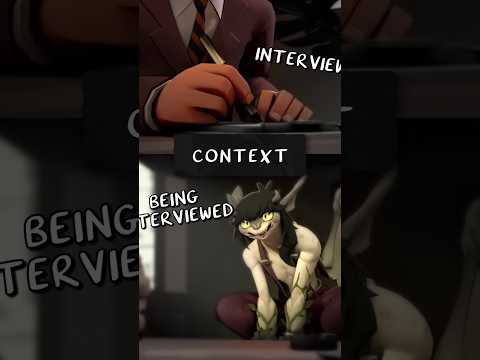
In the world of professional animation, we often rely heavily on facial expressions to convey emotion and intent. But what happens when the face is completely hidden? A recent viral short by "That Gray Cartoon Pony" provides a masterclass in a technique often overlooked by beginners: hand acting.

By analyzing the interviewer character in this short, we see a performance that is entirely driven by secondary motion and hand gestures. Even though we never see the character’s face, his personality, authority, and reactions are crystal clear. This serves as a vital lesson for anyone looking to add more depth and realism to their 3D character.

The Power of Non-Verbal Communication

Hands are the second most expressive part of the human body. When you are animating a 3D character, the hands shouldn't just be "there"—they should be actively participating in the conversation. In the analyzed footage, notice how the interviewer uses his hands to emphasize points, show hesitation, or even project a sense of professional boredom.

The weight and timing of these movements are what make the performance believable. If the hands move too fast, the character feels nervous; if they move with heavy, deliberate pauses, the character feels powerful. Mastering these nuances allows you to tell a story even when your character is partially off-screen or obscured by shadows.

Frame-by-Frame Intentionality

Great animation is a result of intentionality. When we look at this sequence frame-by-frame, it becomes evident that every finger pose is curated. The "acting" happens in the transitions—the way a hand relaxes after a gesture or how the fingers drum against a surface.

To ground your 3D character in a realistic environment, you must consider the "physics of emotion." This means understanding how tension in the shoulders flows down through the arms and manifests in the fingertips. By focusing on these secondary actions, you move away from "robotic" movement and toward a performance that feels organic and lived-in.

Conclusion: Lessons for Animators

The takeaway from this analysis is simple: don't ignore the hands. Whether you are working on a high-stakes action scene or a quiet dialogue-driven short, the way your character uses their hands can define their entire persona. Next time you sit down to animate, try turning off the head layer and see if your character’s body language can still carry the scene. If the hands can tell the story alone, you’ve truly mastered the craft.

Continue Reading | ความคิดเห็น

Master Ultra-Realistic 3D CAD Animation: Combining SolidWorks and Blender

Wednesday, August 19, 2026

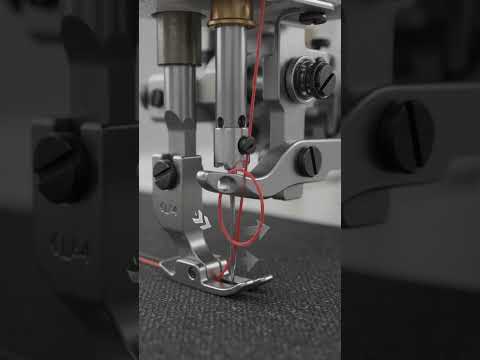
In today's fast-paced digital landscape, visual representation is everything. Whether you are an engineer showcasing a groundbreaking product design or a digital artist bringing complex mechanical movements to life, achieving high-fidelity visuals is essential. By bridging the gap between precise engineering tools and high-end artistic rendering, creators can transform standard 3D CAD models into photorealistic, cinematic animations.

The Power of SolidWorks Meets the Artistry of Blender

SolidWorks has long been an industry standard for mechanical design and parametric modeling. It provides unmatched precision, allowing designers to build intricate components with exact real-world dimensions and constraints. However, while traditional engineering tools excel at functional accuracy, generating cinematic lighting, lifelike textures, and dynamic camera movement often requires advanced rendering software.

This is where Blender enters the workflow. As a versatile, open-source 3D creation suite, Blender offers industry-leading rendering engines, realistic material shaders, and flexible animation tools. Integrating your 3D CAD designs into Blender opens up endless possibilities for creating studio-quality visuals, complete with accurate depth-of-field, lens flares, and physically based rendering (PBR) materials.

Key Workflow Steps for Ultra-Realism

To turn rigid mechanical assemblies into stunning animations, professional creators rely on a seamless hybrid workflow:

  1. Precision CAD Modeling: Build your assembly in SolidWorks or your preferred 3D CAD software, ensuring every joint, bolt, and moving part is structured logically.
  2. Mesh Optimization: Export your model into optimized formats like OBJ or FBX. Pay close attention to mesh density to balance detailed geometric curves with smooth rendering performance.
  3. Advanced Shading and Texturing: Import the model into Blender to assign realistic surface properties, such as brushed metals, clear glass, or subtle surface imperfections like scratches and fingerprints.
  4. Cinematic Lighting and Motion: Utilize studio lighting setups or HDRI environments alongside smooth camera movement to emphasize the sleek contours and functional design of your mechanism.

Elevate Your Visuals Today

Combining the structural accuracy of CAD software with the visual freedom of modern rendering tools is the ultimate secret to producing ultra-realistic animations. By adopting this powerful workflow, you can create compelling product visualizations, engaging marketing materials, and impressive portfolio pieces that captivate any audience.

3D CAD
Continue Reading | ความคิดเห็น

Popular Posts Today

 
Support : 3Dcadbrowser | Grabcad | 3Dcontentcentral | D | E | F | G
Copyright © 2028. Engineering 3DCad Appication - All Rights Reserved