Cad 3D Category

Showing posts with label Game Design. Show all posts

How to Build a Stunning 3D Environment in Godot Fast

Tuesday, November 10, 2026
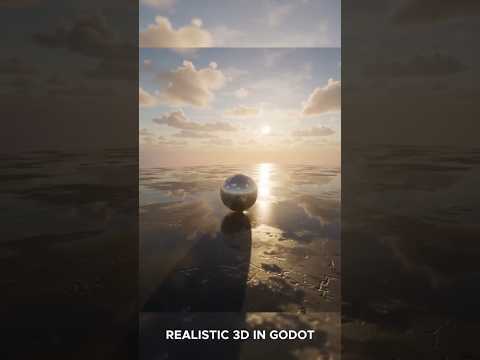
Creating immersive games starts with building atmospheric worlds that captivate players from the very first frame. If you are using the Godot Engine, setting up your own realistic 3D environment is much easier than you might think. Whether you are working on a quick indie project or a full-scale game, mastering environment design in Godot will elevate your visual quality instantly.

Step 1: Set Up Your Core Lighting and WorldEnvironment

The foundation of any breathtaking scene in Godot relies heavily on the WorldEnvironment node and proper lighting. Start by adding a WorldEnvironment node to your main 3D scene. This node acts as the central control hub for background settings, ambient light, and sky configurations.

To achieve realistic lighting quickly: - Use HDRI Skyboxes: Import a high-quality HDRI texture into a PanoramaSkyMaterial. This provides natural, realistic ambient light and reflections across all your game assets. - Configure DirectionalLight3D: Add a DirectionalLight3D node to simulate sunlight or key atmospheric lighting. Enable shadows and adjust energy levels to define clear depth and contrast.

Step 2: Assemble Your World Assets and Materials

Once your lighting foundation is established, it is time to build the actual terrain and structures. Using modular 3D models makes populating your scene quick and efficient. Bring in your terrain meshes, props, vegetation, and architectural elements. Pay close attention to texture maps—using PBR (Physically Based Rendering) materials with proper albedo, roughness, and normal maps will make your 3D environment look polished and professional.

Don't forget post-processing effects! Godot offers built-in visual enhancements such as Glow, Screen Space Ambient Occlusion (SSAO), and Volumetric Fog. Enabling these features adds immediate depth and mood to your level.

Step 3: Optimize for Smooth Performance

A visual masterpiece must also run smoothly on target devices. As you refine your 3D environment, keep performance optimization at the forefront of your process: - Bake Global Illumination: Use VoxelGI or LightmapGI for static geometry to render complex global lighting without draining hardware resources. - Implement Occlusion Culling and LODs: Hide objects that are outside the camera's view and use Level of Detail meshes to maintain high frame rates.

Start Building Today

Creating custom game worlds in Godot doesn't have to take weeks. By combining clever lighting techniques, quality materials, and subtle post-processing, you can craft captivating game spaces fast. Jump into Godot today and turn your creative vision into reality!

Continue Reading | ความคิดเห็น

How to Successfully Sell Your First 3D Asset for Video Games

Wednesday, October 28, 2026

The indie game development scene is booming, creating an insatiable demand for high-quality, ready-to-use game art. If you are a 3D artist looking to turn your digital creations into a sustainable source of income, knowing how to prepare and market your work is essential. Creating a high-quality 3D asset for video games is only half the battle; the real secret lies in optimizing your models for developers.

Here are essential tips to help you successfully sell your 3D models on popular digital marketplaces.

1. Optimize for Real-Time Performance

Game developers prioritize performance and integration ease. A buyer will quickly leave a negative review if your mesh causes lag or requires extensive cleanup. Make sure every 3D asset you list meets standard technical criteria: - Clean Topology: Keep geometry efficient, avoiding unnecessary n-gons and messy edge loops. - Efficient UV Mapping: Maximize texture space usage and place seams strategically to avoid visual artifacts. - Include LODs (Level of Detail): Providing low-polygon variants allows developers to use your model in large, open-world environments without sacrificing frame rates.

2. Master Your Product Presentation

Visual appeal is what drives clicks. A poorly lit preview image will turn potential buyers away, even if the underlying model is technically flawless. - Provide Diverse Render Previews: Include fully lit material renders, clay renders, and clean wireframe views so buyers can inspect your mesh quality. - Showcase Scale and Rigging: If applicable, include a scale reference grid or a short animation preview to demonstrate how the asset behaves in motion. - Write Clear Technical Specifications: Always list vertex counts, texture map resolutions (e.g., 2K, 4K), and available file formats like FBX, OBJ, or GLTF.

3. Target the Right Marketplaces

Do not restrict your work to a single site. Distributing your 3D asset across multiple popular platforms—such as the Unity Asset Store, Unreal Engine Marketplace, CGTrader, and TurboSquid—maximizes your visibility and potential revenue streams.

Final Thoughts

Selling game assets is a continuous learning process. By focusing on clean optimization, transparent technical descriptions, and professional visual previews, you can build a reliable catalog that game developers will return to time and time again.

Continue Reading | ความคิดเห็น

Why I Turned Down Free Help to Build My Next 3D Asset with AI

Sunday, October 18, 2026

In the world of indie game development, "free help" sounds like a dream come true. When you are balancing coding, sound design, and marketing on a shoestring budget, a volunteer’s hand can feel like a lifeline. However, after successfully releasing two games, I recently did the unthinkable: I turned down a generous offer of free assistance and decided to rely on Artificial Intelligence instead.

While it might seem counter-intuitive, this decision wasn't about ego—it was about the hard-learned lessons of project management and the evolving power of modern technology.

The Hidden Cost of "Free"

One of the biggest hurdles for any solo developer isn't just the workload; it’s the management overhead. When you bring another person into a project, even for free, you become a manager. You have to communicate vision, provide feedback, and handle scheduling. For an indie developer, the time spent managing a volunteer often outweighs the time saved on the task itself.

By choosing to use AI, I maintained total creative control and eliminated the "waiting game." I didn't have to wait for an email response or worry about a volunteer losing interest halfway through.

Streamlining the 3D Asset Pipeline

The most significant shift in my workflow has been how I approach visual elements. In the past, creating a high-quality 3D asset meant either spending days modeling it from scratch or coordinating with an artist to ensure the style matched my world. If the proportions were off, it meant another round of revisions and more lost time.

Using AI-assisted tools, the process of generating a complex 3D asset has been cut down to a fraction of the time. I can now iterate on concepts in real-time, refining the geometry and textures until they perfectly fit the atmosphere of my game. This immediacy allows for a level of experimentation that simply isn't possible when you are relying on a third party.

Efficiency is the New Indie Standard

The goal of using AI isn't to replace human creativity, but to amplify it. For a solo dev, speed is a competitive advantage. When I can generate, rig, and implement a 3D asset in a single afternoon, I can spend more time focusing on what really matters: gameplay and player experience.

Ultimately, turning down free help allowed me to stay lean and keep my momentum. AI has become the ultimate "silent partner," providing the efficiency I need to bring my third game to life without the logistical headaches of traditional collaboration. For the modern indie developer, the future isn't just about working harder—it’s about working smarter with the tools at our fingertips.

Continue Reading | ความคิดเห็น

Master Game Character Creation in Blender: Step-by-Step 3D Tutorial

Saturday, September 26, 2026

Creating compelling video game characters is one of the most rewarding skills in modern game development. Blender, a powerful and free open-source software, offers all the industry-standard tools you need to bring your imagination to life. In this comprehensive 3D tutorial, we will explore the complete workflow for designing, modeling, and preparing high-quality character assets ready for modern game engines.

Step 1: Gathering References and Blocking Out the Base Mesh

Before diving into high-density sculpting, every great character starts with a solid foundation. Gather visual references, orthographic turnarounds, and mood boards to guide your vision. Inside Blender, begin by "blocking out" the primary forms using basic geometric primitives like cubes and cylinders. This initial phase focuses strictly on proportions and silhouette rather than fine details, ensuring a balanced anatomic structure from the start.

Step 2: Sculpting Details and Retopology

Once your base proportions are locked in, switch over to Blender’s powerful Sculpt Mode. Here, you can add organic forms, muscle definition, face features, and complex clothing folds. However, high-poly sculpted models contain millions of polygons, making them too heavy for real-time game performance.

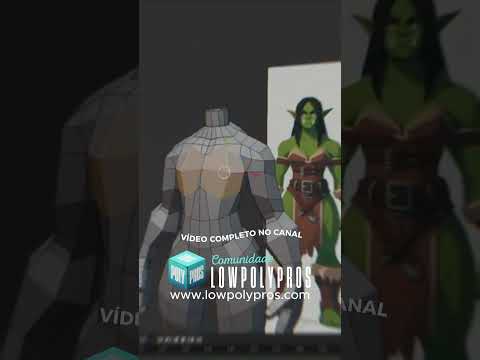
Following a structured 3D tutorial pipeline, the next essential step is retopology. This involves creating a clean, low-poly mesh over your high-density sculpture. Pay close attention to edge loops around deforming areas like eyes, mouth, elbows, and knees to guarantee smooth deformation during animation.

Step 3: UV Unwrapping, Texturing, and Rigging

With your low-poly mesh finalized, perform UV unwrapping to flatten your 3D model into 2D space for texture mapping. You can then bake normal maps from your high-poly sculpt onto the low-poly surface, capturing all the fine details without increasing polygon count. Apply PBR (Physically Based Rendering) materials to give your character realistic skin, cloth, or metallic surfaces.

Finally, add a armature system (rig) and perform weight painting so your character can be posed and animated seamlessly in game engines like Unreal Engine or Unity.

Conclusion

Mastering game character creation requires practice, but breaking down the pipeline into manageable stages makes the process smooth and exciting. Utilizing this 3D tutorial workflow gives you a clear roadmap to turn raw concepts into functional, game-ready assets. Fire up Blender, start practicing, and bring your unique heroes and villains to life today!

Continue Reading | ความคิดเห็น

Popular Posts Today

 
Support : 3Dcadbrowser | Grabcad | 3Dcontentcentral | D | E | F | G
Copyright © 2028. Engineering 3DCad Appication - All Rights Reserved