Cad 3D Category

Showing posts with label 3D Architecture. Show all posts

Discover the Future of Modern Home Design with 3D Architecture

Wednesday, November 11, 2026
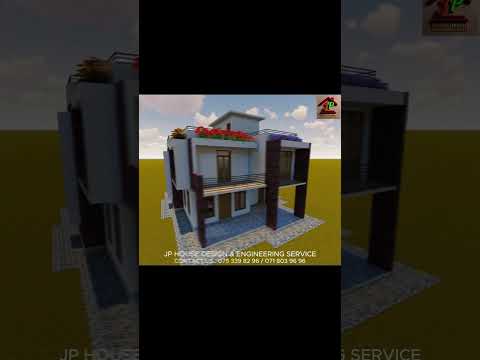
Planning your dream home is one of the most exciting journeys you will ever undertake. However, visualizing a traditional 2D floor plan can often leave room for doubt and misinterpretation. That is where 3D architecture comes in to revolutionize the way we design and build modern homes. Services like JP House Design & Engineering Service leverage advanced modeling techniques to turn complex structural ideas into vibrant, realistic visual experiences.

The Benefits of 3D Architecture in Modern Home Planning

Traditional blueprints show lines and dimensions, but they rarely convey the true feeling of a space. By leveraging 3D architecture, prospective homeowners can walk through every room, analyze natural light distribution, and assess structural aesthetics long before a single brick is laid. This accurate representation dramatically reduces costly design revisions during actual construction and ensures that the final result matches your exact vision.

Key advantages include: - Realistic Visualization: See textures, spatial proportions, and exterior details with stunning photorealistic clarity. - Error Minimization: Spot potential design clashes or layout issues early in the engineering phase. - Enhanced Customization: Experiment with different exterior finishes, roofing styles, and color palettes effortlessly.

Engineering Excellence with Modern 3D Models

A successful house plan balances beautiful aesthetics with structural integrity. Modern 3D models allow engineers and architects to collaborate seamlessly. Whether you are aiming for a compact single-story residence or a spacious multi-level layout, incorporating 3D architecture into your planning process ensures that both safety standards and modern aesthetic trends are met.

With expert guidance from professional engineering services, homeowners gain complete clarity on their investment. From innovative roof lines to functional indoor layouts, digital modeling unlocks endless creative possibilities for any residential property.

Start Building Your Vision Today

If you are preparing to design a new home, moving beyond standard two-dimensional drawings is essential. Embracing modern spatial visualization empowers you to make confident decisions about your property. Explore custom 3D house plans today and take the first step toward transforming your residential dreams into reality.

Continue Reading | ความคิดเห็น

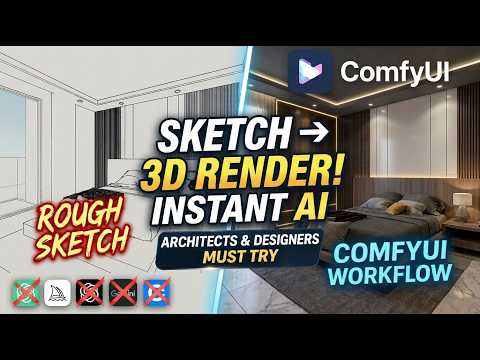
Elevate Your 3D Architecture: Turn Simple Hand Sketches into Realistic Renders with ComfyUI

Thursday, October 29, 2026

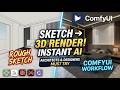
The architectural design process has always relied heavily on initial concept sketches. Translating these rough ideas into high-quality renders traditionally takes hours of painstaking modeling and texturing. Fortunately, cutting-edge AI tools are changing the game. Today, modern creators can revolutionize their 3D architecture workflow by converting simple hand sketches into photorealistic renders using ComfyUI.

Why Use ComfyUI for Architectural Renders?

ComfyUI is a powerful, node-based visual interface designed for image generation models like Stable Diffusion. While local installations can be technical, using a cloud-based version makes it accessible to anyone without requiring expensive GPU hardware.

For architects and designers, this technology drastically reduces iteration time. Instead of building complex CAD models in the early concept phase, you can test material concepts, lighting scenarios, and structural aesthetics in seconds. It allows you to explore endless creative avenues while preserving the original intent of your hand-drawn lines.

How to Turn Your Hand Sketches into Realistic Visuals

Transforming a conceptual sketch into a polished visual requires just a few simple steps within the workflow:

  1. Upload Your Sketch: Input your pencil drawing or digital line sketch into the ComfyUI interface.
  2. Configure Prompts and Control Nodes: Utilize control mechanisms (such as ControlNet) to ensure the AI strictly follows the structural outline of your sketch while applying photorealistic materials, natural lighting, and environment details.
  3. Generate and Refine: Run the workflow to produce high-resolution render options. You can easily tweak prompts to explore different weather conditions, facade materials, or daylight angles.

By integrating AI into early-stage 3D architecture projects, designers can instantly present compelling imagery to clients, securing quick feedback and streamlining overall project communication.

The Future of Architectural Visualization

AI tools like ComfyUI are not replacing architects; rather, they are supercharging the creative process. Embracing these advanced rendering techniques allows you to elevate your 3D architecture concepts, turning quick napkin drawings into client-ready visual presentations effortlessly. Try out the cloud workflow today and experience the future of architectural visualization firsthand!

Continue Reading | ความคิดเห็น

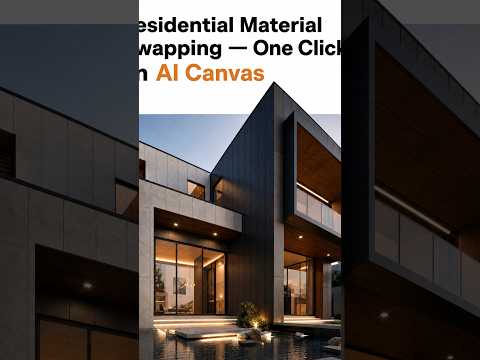
Revolutionize Your 3D Architecture Workflow: Swap Facade Materials in Seconds

Monday, October 19, 2026

Every architect and 3D visualization specialist knows the subtle dread of hearing a quick request from a client: "Can we see what the facade looks like with warm timber instead of modern concrete?"

Traditionally, this simple material swap meant going back to square one. You had to adjust the surface shaders, adjust light settings, and wait three agonizing hours for a new frame to render. Thankfully, those tedious days are over. Next-generation tools in 3D architecture are completely transforming how designers explore materials, letting you change exterior surfaces instantly with a single click.

The Bottleneck of Traditional Rendering

In standard visualization workflows, testing alternative facade finishes is a massive time sink. Whenever a team wants to evaluate modern brick, warm wood paneling, or reflective glass, it usually demands a full re-render. Rebuilding digital assets and waiting on rendering queues drains productivity, stifling the creative process and slowing down client approvals.

One-Click Material Changes Without Re-Rendering

Imagine shifting a building’s entire exterior aesthetic instantly—without rebuilding your geometric model or re-rendering the scene.

With modern techniques in 3D architecture, real-time material swapping allows designers to toggle textures and colors seamlessly. You can present a warm timber facade alongside a sleek slate exterior in seconds. Because you don't need to rebuild the model or wait hours for processing, you can spend more time refining your vision and less time waiting on progress bars.

Elevate Client Presentations and Speed Up Approvals

This shift to dynamic material editing radically improves the client presentation experience. Instead of taking notes and scheduling follow-up meetings days later just to show a simple texture variation, you can make changes live on screen during client reviews.

This level of flexibility elevates your 3D architecture services, positioning your practice as modern, adaptable, and highly efficient. By removing technical barriers to creative iteration, you empower both your team and your clients to make confident design decisions in real time.

Continue Reading | ความคิดเห็น

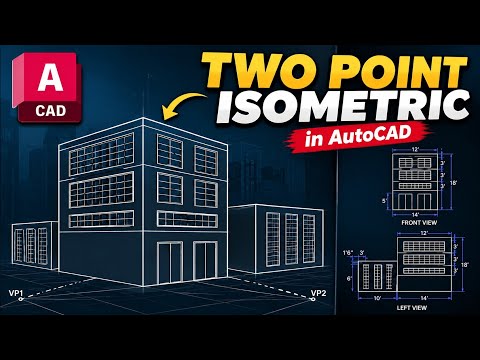
Mastering 3D Architecture: A Step-by-Step Guide to Two-Point Perspective in AutoCAD

Thursday, October 8, 2026

In the world of digital design, the ability to translate a flat concept into a realistic, three-dimensional representation is what sets professional designers apart. When it comes to high-quality 3D architecture, mastering spatial depth is essential for creating compelling visuals that clients can truly understand. One of the most effective ways to achieve this realism in AutoCAD is through the mastery of two-point perspective drawing.

Why Use Two-Point Perspective?

While isometric drawings are excellent for technical clarity, they often lack the natural feel of real-world vision. Two-point perspective solves this by utilizing two vanishing points on a horizon line, mimicking how the human eye perceives buildings from a corner view. This technique is a cornerstone for anyone looking to excel in 3D architecture and professional urban visualization.

Setting Up Your Workspace

Before you begin drawing, ensure your AutoCAD environment is optimized. Start by defining your horizon line—this represents the viewer's eye level. Next, place two vanishing points on the far left and right ends of this line. Organization is key, so we recommend creating specific layers for "Construction Lines," "Main Building Outline," and "Details" to keep your workspace clean.

The Drawing Process: Step-by-Step

  1. The Leading Edge: Start by drawing a single vertical line. This represents the corner of the building closest to the viewer.
  2. Connecting to Vanishing Points: Draw lines from the top and bottom of your vertical edge toward both the left and right vanishing points. This creates the basic "V" shape of your structure.
  3. Defining Depth: Add two more vertical lines to define where the building ends on either side. These lines should stay within the boundaries of the lines connecting to your vanishing points.
  4. Adding Architectural Details: Once the primary block is complete, use the same vanishing point logic to add windows, doors, and rooflines. Every horizontal line on the left side must point to the left vanishing point, and vice-versa.

Conclusion

Perfecting the two-point perspective technique allows you to create more immersive and professional presentations. Visualizing complex structures requires a solid foundation in 3D architecture principles, and AutoCAD provides all the precision tools necessary to bring these perspectives to life. With practice, you will be able to transform simple floor plans into dynamic, three-dimensional masterpieces.

Continue Reading | ความคิดเห็น

Popular Posts Today

 
Support : 3Dcadbrowser | Grabcad | 3Dcontentcentral | D | E | F | G
Copyright © 2028. Engineering 3DCad Appication - All Rights Reserved