Cad 3D Category

Showing posts with label Architectural Design. Show all posts

SketchUp 3D vs. Ingetrazo: Which Workflow Wins for Open-Source Design?

Saturday, October 24, 2026
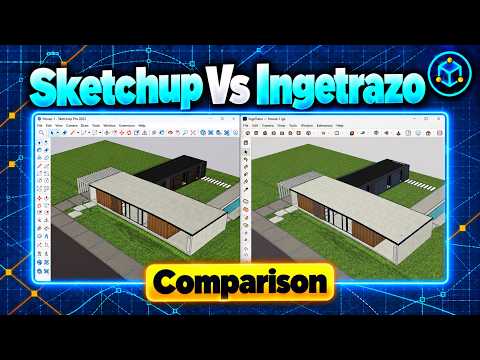
When it comes to 3D modeling and architectural visualization, choosing the right tool can make or break your project’s efficiency. For years, the industry has looked toward established giants, but the rise of open-source alternatives has sparked a new debate. Today, we are breaking down the workflow differences between the legendary SketchUp 3D and the emerging Ingetrazo.

The Power and Versatility of SketchUp 3D

For many designers, SketchUp 3D remains the gold standard for intuitive modeling. Its "push-pull" technology revolutionized how we think about digital space, allowing users to move from a flat 2D sketch to a complex 3D model in a matter of minutes. The strength of this software lies in its massive ecosystem, including the 3D Warehouse and an endless array of plugins that can automate almost any task.

However, as subscription models become the norm, many professionals and hobbyists are looking for free or open-source alternatives that can offer similar results without the recurring costs.

Exploring the Ingetrazo Alternative

Ingetrazo enters the conversation as a compelling option for those who prioritize open-source flexibility. While it may not have the decades of refinement that SketchUp 3D enjoys, it offers a unique workflow tailored for users who want more control over their software environment.

Ingetrazo focuses on streamlining the technical aspects of design, making it an interesting choice for users who are comfortable with open-source logic. For those working on a budget, the lack of a price tag makes it an attractive entry point into the world of spatial design.

Workflow Comparison: Speed vs. Control

When we compare the two side-by-side, the difference usually comes down to "Time to Result." 1. Ease of Use: SketchUp’s learning curve is famously shallow, meaning beginners can produce professional results almost immediately. 2. Customization: Ingetrazo, being part of an open-source mindset, allows for deeper customization for those who understand the underlying mechanics of the software. 3. Compatibility: Because SketchUp 3D is an industry standard, sharing files with engineers or interior designers is often more seamless than with niche open-source tools.

Final Verdict: Which Should You Choose?

The choice between these two platforms depends on your specific goals. If you require a polished, industry-standard tool with a vast library of pre-made assets, the investment in a professional workflow is well worth it. On the other hand, if you are a supporter of free software and enjoy the process of mastering a community-driven tool, Ingetrazo offers a refreshing change of pace.

Regardless of your choice, understanding the strengths of both will help you become a more versatile and informed creator in the digital age.

Continue Reading | ความคิดเห็น

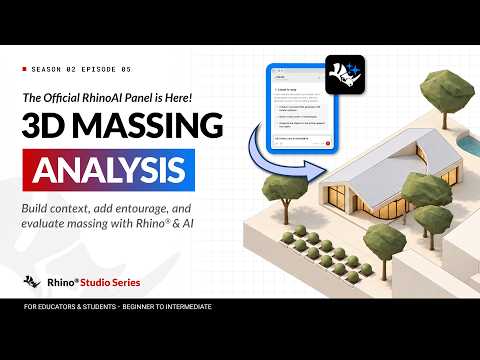
Master Architectural Workflows: Optimizing Massing Analysis with Rhino 3D and AI

Tuesday, October 13, 2026

In the rapidly evolving world of architectural design, the ability to visualize and compare multiple design iterations quickly is a superpower. Whether you are a student or a seasoned professional, mastering massing studies is essential for understanding how a building interacts with its environment. By leveraging the power of Rhino 3D alongside cutting-edge AI tools, designers can now transform abstract concepts into data-driven spatial analyses faster than ever before.

Contextualizing Your Design on a Real Site

The first step in any successful massing analysis is grounding your project in reality. It is no longer enough to design in a vacuum; you must see how your structure sits on a real-world site. By importing site data into your workspace, you can evaluate three distinct massing options simultaneously. This process allows you to see how different volumes affect sunlight, shadows, and the overall urban fabric. Utilizing Rhino 3D for this stage ensures that your geometry is precise and ready for further refinement or environmental testing.

Bringing the Scene to Life with Entourage

A massing model can often feel cold and disconnected. To truly understand the scale and "feel" of a space, adding life—such as trees and people—is crucial. Incorporating these elements into your site plan helps stakeholders visualize the human experience within the design. This stage isn't just about aesthetics; it’s about scale. Seeing a human figure next to a massive glass facade immediately provides a sense of proportion that a simple box cannot convey.

Data-Driven Comparisons Using AI

One of the most powerful features of a modern architectural workflow is the ability to compare multiple options from the exact same perspective. By setting up three consistent camera views, you can swap between design iterations to see which one performs best visually and functionally. When you integrate AI into this phase, you can enhance these views with realistic textures and lighting, providing a glimpse into the future of the project.

Conclusion

Embracing a digital-first approach to massing analysis allows for smarter decision-making and more compelling presentations. By mastering the tools within Rhino 3D and staying ahead of the curve with AI integration, you can ensure that your architectural designs are not only beautiful but also perfectly suited for their real-world context. Stop guessing and start analyzing—your next project deserves that level of precision.

Continue Reading | ความคิดเห็น

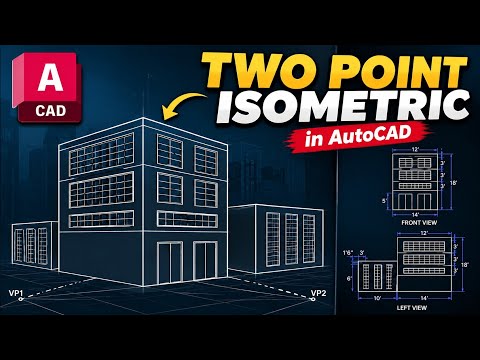
Mastering 3D Architecture: A Step-by-Step Guide to Two-Point Perspective in AutoCAD

Thursday, October 8, 2026

In the world of digital design, the ability to translate a flat concept into a realistic, three-dimensional representation is what sets professional designers apart. When it comes to high-quality 3D architecture, mastering spatial depth is essential for creating compelling visuals that clients can truly understand. One of the most effective ways to achieve this realism in AutoCAD is through the mastery of two-point perspective drawing.

Why Use Two-Point Perspective?

While isometric drawings are excellent for technical clarity, they often lack the natural feel of real-world vision. Two-point perspective solves this by utilizing two vanishing points on a horizon line, mimicking how the human eye perceives buildings from a corner view. This technique is a cornerstone for anyone looking to excel in 3D architecture and professional urban visualization.

Setting Up Your Workspace

Before you begin drawing, ensure your AutoCAD environment is optimized. Start by defining your horizon line—this represents the viewer's eye level. Next, place two vanishing points on the far left and right ends of this line. Organization is key, so we recommend creating specific layers for "Construction Lines," "Main Building Outline," and "Details" to keep your workspace clean.

The Drawing Process: Step-by-Step

  1. The Leading Edge: Start by drawing a single vertical line. This represents the corner of the building closest to the viewer.
  2. Connecting to Vanishing Points: Draw lines from the top and bottom of your vertical edge toward both the left and right vanishing points. This creates the basic "V" shape of your structure.
  3. Defining Depth: Add two more vertical lines to define where the building ends on either side. These lines should stay within the boundaries of the lines connecting to your vanishing points.
  4. Adding Architectural Details: Once the primary block is complete, use the same vanishing point logic to add windows, doors, and rooflines. Every horizontal line on the left side must point to the left vanishing point, and vice-versa.

Conclusion

Perfecting the two-point perspective technique allows you to create more immersive and professional presentations. Visualizing complex structures requires a solid foundation in 3D architecture principles, and AutoCAD provides all the precision tools necessary to bring these perspectives to life. With practice, you will be able to transform simple floor plans into dynamic, three-dimensional masterpieces.

Continue Reading | ความคิดเห็น

Master Revit 3D: A Beginner’s Guide to Views, Templates, and Units

Monday, September 28, 2026

Autodesk Revit is one of the most powerful Building Information Modeling (BIM) software tools used by architects, engineers, and designers worldwide. Whether you are just starting your BIM journey or looking to refine your digital modeling workflow, understanding fundamental project controls is essential. In this guide, we will cover the core steps to set up project templates, configure units, and create detailed views to build stunning Revit 3D models efficiently.

Setting Up Project Templates and Units

Before diving into geometry and wall placements, establishing correct project settings is crucial. Starting with the right project template ensures you have access to pre-configured families, line weights, and view settings tailored to your specific discipline.

Once your template is loaded, setting your project units is the immediate next step. Whether working in millimeters, meters, or feet and inches, configuring units at the beginning prevents costly scaling mistakes later in the design process.

Navigating and Mastering Revit 3D Views

Visualizing your design in a three-dimensional space brings project concepts to life. When working in Revit 3D, spatial awareness is everything. Revit allows users to dynamically rotate, pan, and zoom around building components, giving you total control over design visibility.

Creating dedicated 3D views enables designers to focus on specific building elements, perform shadow studies, or prepare isometric views for presentations. You can easily adjust display styles—from wireframe to realistic rendering—to evaluate how materials and geometry interact in real-world conditions.

Utilizing Section Views for Technical Accuracy

While 3D views give an overall perspective, section views reveal the internal logic of a structure. By cutting a section plane through your floor plan, you gain immediate access to vertical alignment, slab thicknesses, ceiling heights, and structural connections. Section views automatically update in real-time alongside any plan modifications, ensuring your project documentation remains fully synchronized.

Conclusion

Mastering these foundational concepts—templates, project units, 3D navigation, and section detailing—is key to seamless architectural drafting. Implementing these techniques will significantly elevate your BIM workflow and empower you to create precise Revit 3D designs with confidence. Start applying these tools today to build cleaner, more accurate digital models!

Continue Reading | ความคิดเห็น

Transform Your Concepts into Reality with Professional 3D CAD Services

Tuesday, August 25, 2026

In today's fast-paced engineering and architectural landscapes, precision and clarity are paramount. Whether you are designing a complex mechanical component, developing a residential floor plan, or visualizing a multi-story commercial structure, high-quality technical drawings make all the difference. Transitioning from rough sketches to actionable, error-free blueprints requires specialized expertise—and that is where professional 3D CAD services come into play.

From Accurate 2D Drawings to Detailed Models

Every successful construction or manufacturing project starts with a solid technical foundation. Traditional 2D AutoCAD drafting provides the essential framework, delivering accurate floor plans, structural elevations, and detailed technical schematics. However, modern industries require more than flat dimensions to fully realize a design's potential.

By leveraging advanced 3D CAD modeling, design teams can transform two-dimensional drafting into rich, dynamic spatial representations. This enhanced visualization allows engineers, architects, and project stakeholders to analyze structural relationships, evaluate clearances, and detect potential design clashes long before physical production or construction begins. Consequently, this significantly reduces costly rework and unexpected project delays.

Key Benefits of Professional CAD Modeling

Outsourcing your drafting and modeling requirements to experienced professionals offers several strategic advantages:

  • Unmatched Precision: Professional CAD specialists adhere to strict industry standards, ensuring every dimension, tolerance, and material specification is accurate.
  • Cost and Time Efficiency: Maintaining high-end software licenses and specialized in-house staff can be costly. Partnering with experts streamlines your workflow and accelerates project completion.
  • Enhanced Collaboration: Comprehensive digital models make it easy to communicate complex ideas to clients, contractors, and regulatory boards, fostering seamless collaboration.

Elevate Your Design Capabilities Today

Integrating modern 3D CAD solutions into your development pipeline is essential for staying competitive in today's market. By combining precise 2D drafting with detailed spatial modeling, professional CAD services empower you to present compelling proposals, streamline approvals, and build with complete confidence. Explore our comprehensive drafting and CAD modeling services today to bring your vision to life.

3D CAD
Continue Reading | ความคิดเห็น

Popular Posts Today

 
Support : 3Dcadbrowser | Grabcad | 3Dcontentcentral | D | E | F | G
Copyright © 2028. Engineering 3DCad Appication - All Rights Reserved