Cad 3D Category

Showing posts with label Onshape. Show all posts

Mastering 3D CAD: The Ultimate Beginner’s Guide to Cloud-Based Onshape

Saturday, September 12, 2026
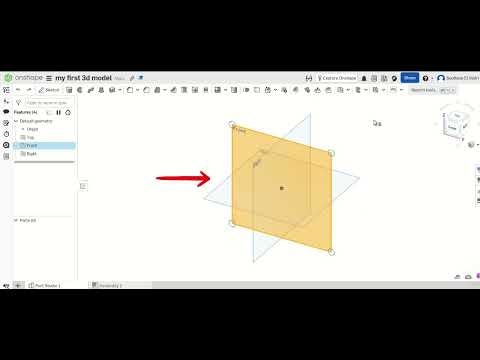
Are you ready to transform your creative concepts into tangible objects? Whether you are a hobbyist, an aspiring engineer, or a product designer, the world of digital design has never been more accessible. In this guide, we dive deep into Onshape, a revolutionary platform that is changing how we approach 3D CAD by moving the entire design process into the cloud.

Why Choose Cloud-Based Design?

Traditional design software often requires expensive hardware and complex installations. Onshape breaks these barriers by operating entirely within your web browser. This means you can access your projects from any device, anywhere in the world, without worrying about software versions or local storage. For those just starting their journey in 3D CAD, this accessibility removes the technical friction often associated with professional-grade engineering software.

Mastering the Basics of Onshape

In this second part of our beginner's series, we move beyond the interface and start building. Onshape’s power lies in its parametric modeling capabilities. This allows you to create designs based on constraints and dimensions, ensuring that every part fits perfectly within a larger assembly.

The workflow typically follows a logical progression: 1. Sketching: Creating the 2D foundation of your part. 2. Constraints: Defining relationships between lines and points to ensure stability. 3. Features: Using tools like "Extrude," "Revolve," or "Fillet" to turn those 2D sketches into 3D objects.

By mastering these fundamental steps, you gain the confidence to tackle more complex geometries and multi-part assemblies.

From Concept to Reality

The true magic of 3D CAD lies in its ability to bridge the gap between imagination and manufacturing. Once your model is complete in Onshape, it can be easily exported for 3D printing, CNC machining, or laser cutting. Because the software is cloud-based, collaboration is built into its DNA; you can share your documents with a single click, allowing for real-time feedback and teamwork.

As you continue to practice, you will find that 3D modeling is not just about drawing—it’s about problem-solving. Every sketch and feature is a step toward bringing your unique ideas to life. Stick with the process, keep experimenting with the tools, and you’ll be amazed at what you can create.

Continue Reading | ความคิดเห็น

Mastering Onshape: The Ultimate Beginner's Guide to Cloud-Based 3D CAD

Are you ready to transform your creative ideas into digital reality? Modern product design and engineering have evolved rapidly, moving away from heavy, desktop-bound software toward streamlined, cloud-based solutions. If you are just starting your design journey, learning a powerful 3D CAD platform like Onshape is one of the best ways to kickstart your skill set.

In this beginner-friendly guide, we explore how Onshape simplifies the design workflow and why browser-based modeling is revolutionizing the industry.

Why Choose Onshape for Cloud-Based Modeling?

Traditional design software often requires high-end graphics hardware, complex installation procedures, and messy file management. Onshape changes the game by operating entirely inside your web browser. This means you can access your projects from virtually any computer or tablet without worrying about software updates or lost files.

Key advantages include: - Real-Time Collaboration: Work on projects simultaneously with team members, much like Google Docs. - Automatic Version Control: Every change is saved instantly, eliminating the fear of losing progress or overwriting critical revisions. - Zero Installation: Open your browser, log in, and start modeling immediately from anywhere.

Essential Workflow in Cloud-Based 3D CAD

Mastering 3D CAD is much easier when you understand the basic design lifecycle. In Onshape, your workflow generally follows a clear, logical sequence:

  1. 2D Sketching: Begin by selecting a design plane (Top, Front, or Right) and creating 2D profiles using essential shapes like lines, circles, and rectangles.
  2. Applying Constraints: Define precise dimensions and geometric relationships so your sketch behaves predictably when adjusted.
  3. 3D Feature Creation: Convert your 2D sketch into a solid 3D object using primary tools like Extrude, Revolve, or Fillet.
  4. Assembly and Testing: Combine multiple parts together to see how they fit and move relative to one another.

Ready to Elevate Your Design Skills?

Whether you want to create custom parts for 3D printing, conceptualize consumer products, or build a foundation for an engineering career, mastering 3D CAD opens up endless possibilities. Start experimenting with simple shapes today, practice regularly, and watch your creative ideas come to life in the cloud!

Continue Reading | ความคิดเห็น

Popular Posts Today

 
Support : 3Dcadbrowser | Grabcad | 3Dcontentcentral | D | E | F | G
Copyright © 2028. Engineering 3DCad Appication - All Rights Reserved