Cad 3D Category

Showing posts with label ZBrush. Show all posts

Mastering 3D Sculpting for Custom Jewelry: From Blockout to Detail in ZBrush

Saturday, October 17, 2026
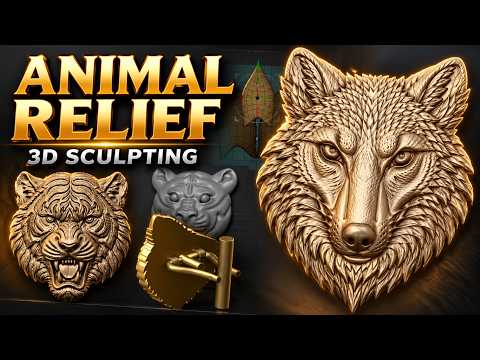
Crafting high-end custom jewelry has evolved significantly with modern technology. Whether you are creating fierce animal motifs like a detailed tiger head or refined accessories like fox head cufflinks, mastering 3D sculpting in ZBrush opens up endless possibilities for jewelry designers looking to push creative boundaries.

In this guide, we will explore key tips and techniques to take your digital jewelry designs from basic blockouts to production-ready masterpieces.

1. The Power of Blocking: Laying the Foundation

Every impressive sculpt starts with a solid foundation. Before diving into fine fur textures or intricate facial features, focus on the primary forms. Blocking out the base mesh is one of the most crucial stages in digital 3D sculpting.

By using basic primitives—such as spheres and cylinders—you can quickly establish the accurate proportions and silhouette of an animal head. Getting the silhouette right early on saves hours of refinement later and ensures your jewelry piece maintains structural balance when 3D printed and cast into precious metals.

2. Utilizing Nanomesh for Intricate Jewelry Details

Adding repeating textures, scales, or micro-patterned embellishments manually can be exhausting. This is where ZBrush’s Nanomesh tool becomes a game-changer for jewelry artists:

  • Speed and Efficiency: Instantly duplicate geometric patterns across polygroups.
  • Non-Destructive Editing: Adjust the scale, orientation, and placement of details on the fly.
  • Optimized Performance: Keep your workspace responsive while managing dense, complex surface textures.

Whether you are building stylized fur accents or decorative bands on custom cufflinks, Nanomesh lets you achieve high-density detail cleanly and efficiently.

3. Refining Form and Preparing for Production

Once your secondary details and Nanomesh patterns are in place, focus on the functional aspects of jewelry design. Ensure wall thicknesses meet casting standards, solidify hollow areas, and seamlessly blend organic forms—like a fox or tiger head—onto practical components like cufflink stems, pendant bails, or ring shanks.

Conclusion

Integrating smart digital techniques into your workflow allows you to bring bold, intricate concepts to life effortlessly. By incorporating solid blockout methods and powerful features like Nanomesh into your 3D sculpting toolkit, you can elevate your craft and produce stunning, professional-grade jewelry pieces that capture attention.

Continue Reading | ความคิดเห็น

Mastering Character Design: Creating a Funny Sci-Fi Head with ZBrush 3D

Friday, October 2, 2026

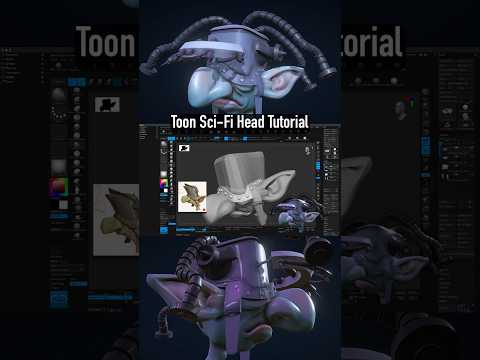
Creating characters doesn’t always have to be about gritty realism or terrifying monsters. Sometimes, the most memorable designs are those that spark a smile. In our latest step-by-step tutorial, we explore the lighter side of digital sculpting by crafting a quirky, funny sci-fi head. Using the powerful tools within ZBrush 3D, we break down the process of turning a simple sphere into a personality-filled extraterrestrial.

Finding Inspiration in the Stars

The beauty of science fiction is that there are no rules. When you are designing a "funny" character, you have the creative freedom to exaggerate features. Think about oversized eyes, asymmetrical ears, or even ridiculous facial expressions. The goal is to blend high-tech sci-fi elements with a sense of humor that resonates with the viewer.

Why ZBrush 3D is the Artist’s Choice

For digital sculptors, ZBrush 3D remains the industry standard for a reason. Its ability to handle millions of polygons while maintaining a smooth, tactile feel makes it the perfect environment for character art. Whether you are a beginner or a seasoned pro, the software’s intuitive brushes—like Move, Clay Buildup, and DamStandard—allow you to push and pull your digital clay until your character's personality starts to shine through.

Step-by-Step Character Foundations

Every great sculpt starts with a solid foundation. In this tutorial, we begin with "blocking out" the primary shapes. By focusing on the silhouette first, we ensure the character looks interesting from every angle. Once the base head is established, we move into the secondary forms, where we add those specific "funny" traits that give the alien its charm.

Adding the Sci-Fi Details

A sci-fi character isn't complete without some technological flair. We demonstrate how to integrate "hard surface" elements into your organic sculpt. From tiny cybernetic implants to unusual skin textures, these details provide a contrast that makes the character pop. By leveraging the advanced features of ZBrush 3D, you can easily transition between fleshy, organic shapes and sharp, mechanical parts.

Conclusion

Character creation is a journey of discovery. By following this step-by-step guide, you aren't just learning how to use software; you are learning how to tell a story through design. So, grab your stylus, fire up your workstation, and let’s start sculpting something out of this world!

Continue Reading | ความคิดเห็น

Popular Posts Today

 
Support : 3Dcadbrowser | Grabcad | 3Dcontentcentral | D | E | F | G
Copyright © 2028. Engineering 3DCad Appication - All Rights Reserved