Cad 3D Category

Showing posts with label Blender. Show all posts

Mastering Blender as a Student: A Spooky Graveyard 3D Tutorial

Friday, October 30, 2026
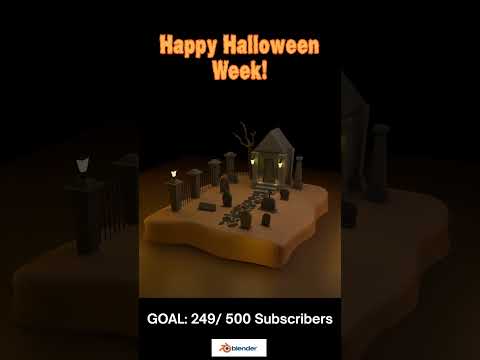
Diving into the world of 3D design can feel overwhelming, especially when you are balancing your studies. However, learning open-source software like Blender is one of the most rewarding skills a student or aspiring digital artist can build. If you want to level up your graphic design portfolio with atmosphere and charm, following a guided 3D tutorial focused on a specific theme—such as a spooky Halloween graveyard—is the ultimate way to start.

Why Start with a Thematic Environment?

Building a stylized scene from scratch teaches you core concepts without making the learning process feel like a chore. A spooky graveyard environment offers a balanced mix of simple geometric modeling and expressive lighting:

  • Basic Modeling: Objects like tombstones, wooden crosses, and crooked fences rely on fundamental shapes, making them ideal for beginners.
  • Atmospheric Lighting: Cool moonlight, volumetric fog, and deep shadows instantly bring mood and storytelling into your project.
  • Scene Composition: Distributing assets across uneven ground teaches you camera placement, scale, and visual balance.

Essential Steps to Build Your Graveyard Scene

  1. Block Out the Base: Start by sculpting a subtle ground plane and placing basic primitive shapes to represent headstones and dead trees. Focus on overall arrangement before adding fine details.
  2. Apply Materials and Textures: Give your assets character with simple materials. Dark slate, weathered wood, and desaturated green grass create an authentic eerie aesthetic.
  3. Set the Mood with Lighting: Introduce a soft blue light source to simulate moonlight and experiment with Blender’s atmospheric haze. Strategic lighting transforms simple models into a captivating visual.

Tips for Student 3D Artists

The key to mastering software like Blender is consistency over perfection. You do not need to render a Hollywood-grade motion picture on your first attempt. By taking on bite-sized, fun projects and relying on a structured 3D tutorial, you can steady your learning curve and achieve impressive results quickly.

Whether you are expanding your design portfolio or simply exploring a new hobby, crafting thematic scenes will build your creative confidence. Fire up Blender, dive into a high-yield 3D tutorial, and start bringing your spooky visual ideas to life today!

Continue Reading | ความคิดเห็น

Mastering 3D Character Animation in Blender: A Vibrant Candyland Showcase

Thursday, October 29, 2026

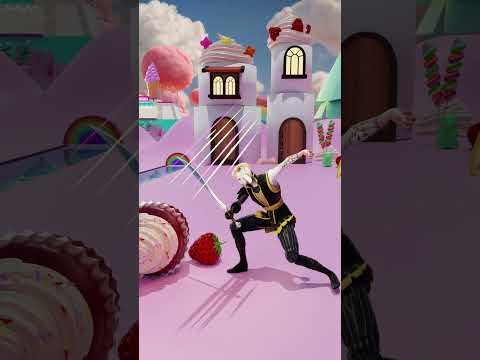
Imagine stepping into a world where sugary landscapes meet high-octane action. That is precisely the vision behind this latest animation showcase built inside Blender. By blending vibrant, candy-filled environments with swift combat moves and fluid dance routines, this project demonstrates the incredible creative freedom modern digital art tools offer.

Action Meets Whimsy: Combat and Choreography

Animating in a fantasy environment requires a careful balance between personality and motion. In this project, the primary goal was pushing the physical limits of a 3D character. The animation sequence transitions seamlessly from aggressive sword swings and acrobatic flips to lighthearted, expressive dance routines.

Contrasting intense swordplay with playful choreography gives the project a distinct rhythm. It proves that dynamic motion design isn't just about action—it is about conveying a hero's full personality through subtle secondary motions and dramatic poses.

Unleashing Creative Power with Blender

Blender continues to be an indispensable tool for indie game developers and digital artists alike. Creating smooth keyframe interactions within a detailed, candy-coated world presents fun challenges, particularly regarding lighting, material shading, and spatial awareness.

When rigging and animating a dynamic 3D character, precise weight painting and flexible armature setups are essential. Blender’s powerful timeline and pose tools allowed for quick iterations, making it easy to refine every sword arc, weight shift, and landing impact until the movement felt weightless yet impactful.

Elevating Indie Game Development

In the realm of game design, memorable movement is key to keeping players engaged. A well-designed 3D character must feel alive, whether performing intricate combat combos or celebrating a victory with an energetic dance. Exploring these varied motion cycles in a playful setting offers fantastic inspiration for future gaming projects.

Whether you are working on stylized cutscenes or fluid gameplay mechanics, pushing the boundaries of animation in Blender is one of the best ways to sharpen your pipeline. Stay tuned for more animation breakdowns as this sweet adventure continues to evolve!

Continue Reading | ความคิดเห็น

Stunning Jewelry Renderings: The Power of 3D Visualization in Blender

Tuesday, October 27, 2026

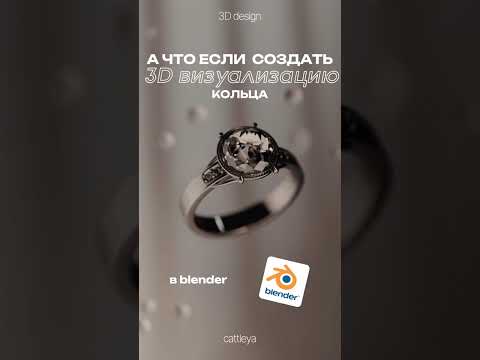
In the world of fine craft and luxury design, presentation is everything. Traditionally, showcasing high-end jewelry required physical samples, complex studio lighting, and expensive photo shoots. Today, digital tools have reshaped the creative process. With powerful open-source software like Blender, artists and jewelers can achieve breathtaking 3D visualization that captures every sparkle, reflection, and intricate detail of a ring long before physical production even begins.

Why Blender is Ideal for Jewelry Rendering

Blender has evolved into an industry powerhouse for creators looking to craft photorealistic digital assets. When working with jewelry, precision and lighting are paramount. Blender’s rendering engine enables designers to accurately simulate real-world light physics, glass refractions, and metallic surfaces like gold, silver, and platinum.

By applying custom material nodes, artists can capture the brilliance of precious gems and the subtle surface details of polished metal. Paired with smooth camera movement and cinematic close-up animations, static jewelry designs are transformed into dynamic visual experiences that captivate viewers.

Streamlining Design and Digital Marketing

Integrating high-quality 3D visualization into a jewelry design workflow provides key creative and business advantages:

  • Cost-Effective Prototyping: Designers can experiment with gemstone cuts, metal finishes, and settings virtually, saving significantly on physical manufacturing costs.
  • Engaging Social Content: Eye-catching 3D animations engineered for short-form video platforms like YouTube Shorts and Instagram Reels help creators instantly capture audience attention.
  • Pre-Visualization for Clients: Photorealistic renders allow bespoke jewelry clients to preview and approve custom pieces with full confidence prior to casting.

The Future of Digital Jewelry Creation

As digital artistry continues to blur the line between virtual models and reality, adopting modern tools is essential for content creators and brands alike. Whether you are a 3D animator building a portfolio or a commercial jeweler expanding your digital catalog, leveraging 3D visualization opens up infinite creative possibilities.

Start exploring Blender's powerful lighting and shading tools today, and bring your luxury jewelry concepts to life in vibrant 3D detail.

Continue Reading | ความคิดเห็น

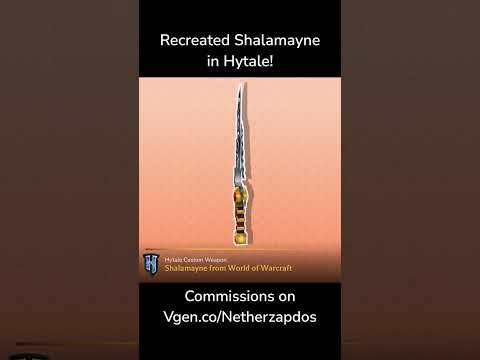
Shalamayne Hytale Weapon Mod #hytale #worldofwarcraft #wow #blender3d #blender #blockbench #3d - Blender 3D

Wednesday, October 14, 2026

Technical Overview: Shalamayne Hytale Weapon Mod #hytale #worldofwarcraft #wow #blender3d #blender #blockbench #3d

This article provides an in-depth analysis and overview of 'Blender 3D', covering structural mechanisms and operational workflows to help professionals and enthusiasts understand key parameters and components thoroughly.

In-depth Structural & Operational Analysis

My Hytale Assets Store: https://payhip.com/Netherzapdos ✨ Commissions: https://vgen.co/Netherzapdos Also available for ...

Key Takeaways & Summary

Based on the review of 'Shalamayne Hytale Weapon Mod #hytale #worldofwarcraft #wow #blender3d #blender #blockbench #3d' regarding 'Blender 3D', understanding the underlying mechanics and structural components significantly enhances operational efficiency and maintenance practices.

Continue Reading | ความคิดเห็น

Master Game Character Creation in Blender: Step-by-Step 3D Tutorial

Saturday, September 26, 2026

Creating compelling video game characters is one of the most rewarding skills in modern game development. Blender, a powerful and free open-source software, offers all the industry-standard tools you need to bring your imagination to life. In this comprehensive 3D tutorial, we will explore the complete workflow for designing, modeling, and preparing high-quality character assets ready for modern game engines.

Step 1: Gathering References and Blocking Out the Base Mesh

Before diving into high-density sculpting, every great character starts with a solid foundation. Gather visual references, orthographic turnarounds, and mood boards to guide your vision. Inside Blender, begin by "blocking out" the primary forms using basic geometric primitives like cubes and cylinders. This initial phase focuses strictly on proportions and silhouette rather than fine details, ensuring a balanced anatomic structure from the start.

Step 2: Sculpting Details and Retopology

Once your base proportions are locked in, switch over to Blender’s powerful Sculpt Mode. Here, you can add organic forms, muscle definition, face features, and complex clothing folds. However, high-poly sculpted models contain millions of polygons, making them too heavy for real-time game performance.

Following a structured 3D tutorial pipeline, the next essential step is retopology. This involves creating a clean, low-poly mesh over your high-density sculpture. Pay close attention to edge loops around deforming areas like eyes, mouth, elbows, and knees to guarantee smooth deformation during animation.

Step 3: UV Unwrapping, Texturing, and Rigging

With your low-poly mesh finalized, perform UV unwrapping to flatten your 3D model into 2D space for texture mapping. You can then bake normal maps from your high-poly sculpt onto the low-poly surface, capturing all the fine details without increasing polygon count. Apply PBR (Physically Based Rendering) materials to give your character realistic skin, cloth, or metallic surfaces.

Finally, add a armature system (rig) and perform weight painting so your character can be posed and animated seamlessly in game engines like Unreal Engine or Unity.

Conclusion

Mastering game character creation requires practice, but breaking down the pipeline into manageable stages makes the process smooth and exciting. Utilizing this 3D tutorial workflow gives you a clear roadmap to turn raw concepts into functional, game-ready assets. Fire up Blender, start practicing, and bring your unique heroes and villains to life today!

Continue Reading | ความคิดเห็น

Popular Posts Today

 
Support : 3Dcadbrowser | Grabcad | 3Dcontentcentral | D | E | F | G
Copyright © 2028. Engineering 3DCad Appication - All Rights Reserved