Cad 3D Category

Showing posts with label AutoCAD Tips. Show all posts

Mastering AutoCAD and 3ds Max: Essential Tips for Architectural Design

Monday, November 16, 2026
Architectural design requires a seamless blend of technical precision and artistic visual appeal. Whether you are drafting a detailed 2D house plan or constructing a full structural model, mastering your digital tools is essential for bringing architectural concepts to life efficiently.

The Foundation of Great Design: 2D Drafting

Every impressive architectural project begins with a solid 2D floor plan. Precise drafting ensures that structural measurements, spatial layouts, and mechanical details are accurate before moving to the visual modeling stage. Using clean layer management, proper unit setups, and reusable blocks in your initial CAD workflow saves hours of redundant work. A well-organized draft forms the backbone of any professional design project, making the transition to 3D software smooth and effortless.

Bridging CAD Drafting with 3ds Max Visualization

While 2D floor plans provide technical accuracy, clients often demand realistic visual presentations. This is where combining fundamental CAD techniques with 3ds Max becomes invaluable. By importing clean, organized line work into visualization software, designers can quickly extrude walls, build complex 3D environments, and refine geometric details.

Using 3ds Max allows you to apply lifelike materials, realistic lighting setups, and advanced camera angles to convert basic floor plans into breathtaking photorealistic renders. Mastering this combined workflow bridges the gap between technical blueprint creation and stunning visual art.

Essential Tips for a Faster Design Workflow

To optimize your drafting process and prepare your CAD files efficiently for rendering, keep these core practices in mind: - Maintain Clean Layers: Keep walls, doors, windows, and annotations on separate, clearly labeled layers. - Purge Unnecessary Data: Use cleaning commands to remove unused blocks and duplicate lines, keeping file sizes manageable. - Use Closed Polylines: Ensure wall outlines are closed shapes, making them much easier to extrude into 3D geometry later on.

Conclusion

Whether you are a beginner learning the basics of house planning or an experienced designer refining your technique, integrating precise drafting habits with powerful software like 3ds Max will significantly elevate the quality of your portfolio. Start streamlining your architectural workflow today to create clearer technical plans and dynamic 3D visualizations!

Continue Reading | ความคิดเห็น

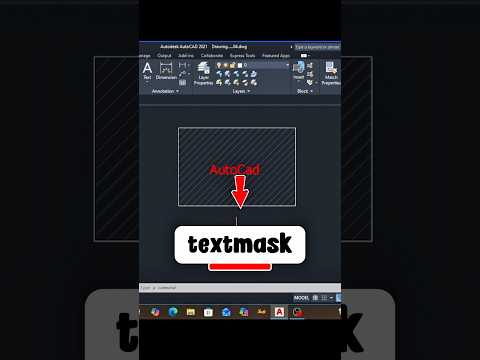
Master the Textmask Command: Essential Engineering CAD Tips for Cleaner Drawings

Sunday, September 27, 2026

When working on complex technical drawings, clarity is the most important factor. There is nothing more frustrating than trying to read critical dimensions or annotations that are obscured by hatch patterns, grid lines, or overlapping geometry. In the professional world of Engineering CAD, maintaining a clean and readable workspace is a hallmark of a high-quality project.

One of the most effective yet underutilized tools to solve this problem is the TEXTMASK command. In this guide, we will explore how this feature can transform your workflow and improve the professional quality of your documentation.

What is Textmask in AutoCAD?

The Textmask command creates a "mask" or a hidden background behind your text or MText objects. This mask automatically hides any drawing elements (lines, circles, or hatches) that sit directly behind the text. Unlike simply moving text to an empty space, Textmask allows you to place annotations exactly where they need to be—even over busy areas—without sacrificing legibility.

How to Use the Textmask Command

Using this tool is straightforward and can be done in just a few seconds. Follow these steps: 1. Type the Command: Type TEXTMASK into the command line and press Enter. 2. Select the Text: Click on the text or multiline text (MText) objects you wish to mask. 3. Adjust Settings (Optional): You can enter 'O' for Options to choose the mask type (Wipeout, Solid, or 3D Face) and adjust the offset distance. 4. Apply: Press Enter again to complete the process.

Your text will now appear clearly with a clean buffer around it, ensuring that your Engineering CAD designs remain professional and easy to interpret for contractors and manufacturers.

Why Every CAD Drafter Should Use It

In a busy project, you often don't have the luxury of "dead space" to place your notes. Using Textmask ensures that your annotations stand out. Furthermore, if you need to revert the changes, the TEXTUNMASK command allows you to remove the background instantly without damaging the underlying geometry.

Mastering these small but powerful tips is what separates a beginner from a professional in the field of Engineering CAD. By implementing the Textmask command into your daily routine, you save time on manual trimming and ensure your final outputs are always top-tier.

Continue Reading | ความคิดเห็น

Boost Your Efficiency in 3D CAD: The Power of AutoCAD's Stretch Command

Saturday, September 5, 2026

In the fast-paced world of digital design, drafting efficiency is everything. Whether you are an architect, engineer, or student mastering 3D CAD software, learning how to streamline your workflow can save you hours of tedious editing. One of the most underrated yet powerful tools in AutoCAD is the STRETCH command—a feature that seamlessly combines the actions of both 'Move' and 'Extend' into a single, effortless operation.

Why the Stretch Command is a Game-Changer

Traditionally, modifying a drawing or design element involves multiple steps. If you need to lengthen a section of a component, you might find yourself moving a boundary line first and then using the 'Extend' command to bridge the remaining gap. This repetitive process disrupts your creative flow and slows down project delivery.

The STRETCH command solves this problem instantly. By using an intelligent selection method, it moves chosen vertices while extending connected geometry simultaneously. This dual functionality allows 3D CAD professionals and 2D drafters alike to modify complex drawings with surgical precision in half the time.

How It Works: Combining Move and Extend

To execute the STRETCH command effectively, the secret lies in how you select your objects:

  1. Activate the Command: Type STRETCH (or the shortcut S) into the command line and press Enter.
  2. Use a Crossing Window: Click and drag a crossing selection box from right to left (the green selection window). Ensure you enclose the endpoints or vertices you want to move, while crossing the line segments you want to stretch.
  3. Specify a Base Point: Click a base point in your workspace to begin the movement.
  4. Perform the Action: Drag your cursor in the desired direction or input an exact dimension for exact placement.

As you drag the base point, the selected endpoints move to the new location, while the crossing lines automatically extend or contract to stay connected.

Elevate Your Design Workflow

Incorporating smart command shortcuts into your daily routine drastically improves overall modeling productivity. Instead of constantly switching between basic editing functions, utilizing the combined power of STRETCH lets you maintain focus on precision and design innovation. Apply this simple trick to your next 3D CAD or drafting project to experience a cleaner, faster design workflow!

Continue Reading | ความคิดเห็น

Precision Design: How to Clean Up Extra Lines in AutoCAD and 3D CAD Projects

Friday, September 4, 2026

Precision is the name of the game when it comes to technical drafting. Whether you are working on a simple 2D floor plan or a complex 3D CAD model, stray lines can clutter your workspace and lead to costly errors. Learning how to efficiently remove these unwanted elements is a fundamental skill that separates amateur hobbyists from professional designers.

Why Line Management Matters

Keeping your drawing "clean" isn't just about aesthetics; it is about data integrity. In the world of professional engineering, extra lines can interfere with object snapping, bloat your file sizes, and cause significant confusion during the rendering phase. If you plan to export your 2D geometry into a more robust 3D CAD environment for extrusion or assembly, those tiny overlapping lines can prevent surfaces from closing properly, resulting in broken geometry that is difficult to fix later.

Essential Commands: Erase and Trim

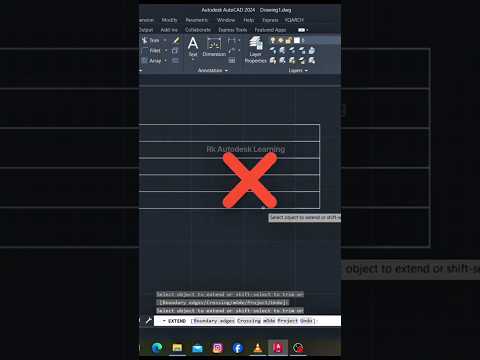
The most straightforward way to remove an object is the ERASE command (shortcut: E). Simply select the line and hit enter. However, you often don't want to delete an entire entity, but rather a segment that extends too far beyond an intersection. This is where the TRIM command (shortcut: TR) becomes your most valuable tool.

In modern versions of AutoCAD, the Trim tool features a "Quick Mode" by default. This allows you to simply click or "fence" across any line segment to remove it instantly without needing to manually select cutting edges first. For those working on intricate 3D CAD layouts, holding the Shift key while using the Trim command allows you to instantly toggle to the EXTEND command, making it a versatile workflow for cleaning up messy intersections on the fly.

Using the Overkill Command for a Perfect Finish

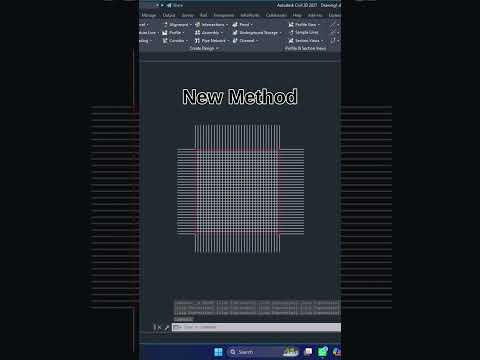
Sometimes, extra lines aren't visible because they are hidden directly on top of each other. These "duplicate" lines are a common headache in drafting. To solve this, use the OVERKILL command. This powerful tool searches your entire workspace and automatically deletes overlapping or redundant geometry.

By mastering these simple deletion and trimming techniques, you ensure that your projects remain lightweight, professional, and ready for any advanced design stage. Whether you are a student or a seasoned pro, a clean drawing is the foundation of a successful project.

Continue Reading | ความคิดเห็น

Master AutoCAD: How to Quickly Delete Extra Lines in 3D CAD Projects

A cluttered drawing canvas can slow down your design workflow, waste system resources, and lead to frustrating modeling errors. Whether you are drafting simple 2D schematics or preparing precise geometry for complex 3D CAD models, keeping your linework clean and organized is an essential skill for every designer and engineer.

In this quick guide, we will explore the most efficient ways to delete unwanted or extra lines in AutoCAD using simple, high-speed commands.

Essential Commands for Quick Line Deletion

When working on a detailed layout, you will frequently encounter stray line segments that need to be trimmed or completely removed. Here are the primary tools to get the job done:

  1. The TRIM Command (Shortcut: TR) The TRIM tool is ideal when you want to snip off sections of a line that extend past an intersection without removing the whole object.
  2. How to use it: Type TR and press Enter. In modern AutoCAD versions, simply click or drag across any line segment you wish to trim away.

  3. The ERASE Command (Shortcut: E) If a line is completely redundant, trimming it piece-by-piece is inefficient.

  4. How to use it: Select the unwanted lines with your cursor and press Delete, or type E and press Enter to erase them instantly.

Advanced Cleanup: Eliminating Overlapping Lines

Extra lines are not always visible at first glance—sometimes duplicate geometry sits directly underneath your visible drawing. Overlapping geometry can create major headache when converting 2D sketches into a solid 3D CAD shape.

To clear hidden duplicates, use the powerful OVERKILL command: * Type OVERKILL into the command line and press Enter. * Select your entire drawing or specific target objects. * Adjust the settings in the dialogue window to automatically join collinear lines and delete duplicate objects.

Final Thoughts

Mastering these core line-deletion techniques will dramatically increase your drafting speed and overall drawing accuracy. Maintaining clean, duplicate-free linework from the start ensures seamless transitions into advanced 3D CAD workflows. Apply these tips to your next AutoCAD project to keep your workspace tidy and efficient!

3D CAD
Continue Reading | ความคิดเห็น

Popular Posts Today

 
Support : 3Dcadbrowser | Grabcad | 3Dcontentcentral | D | E | F | G
Copyright © 2028. Engineering 3DCad Appication - All Rights Reserved